
You need small clear elastic bands instead of a normal ponytail holder. Regular ones are too large and bulky and will show. I got these at the Dollar Tree, but I am sure they can be found anywhere.

First step: do a low side ponytail...
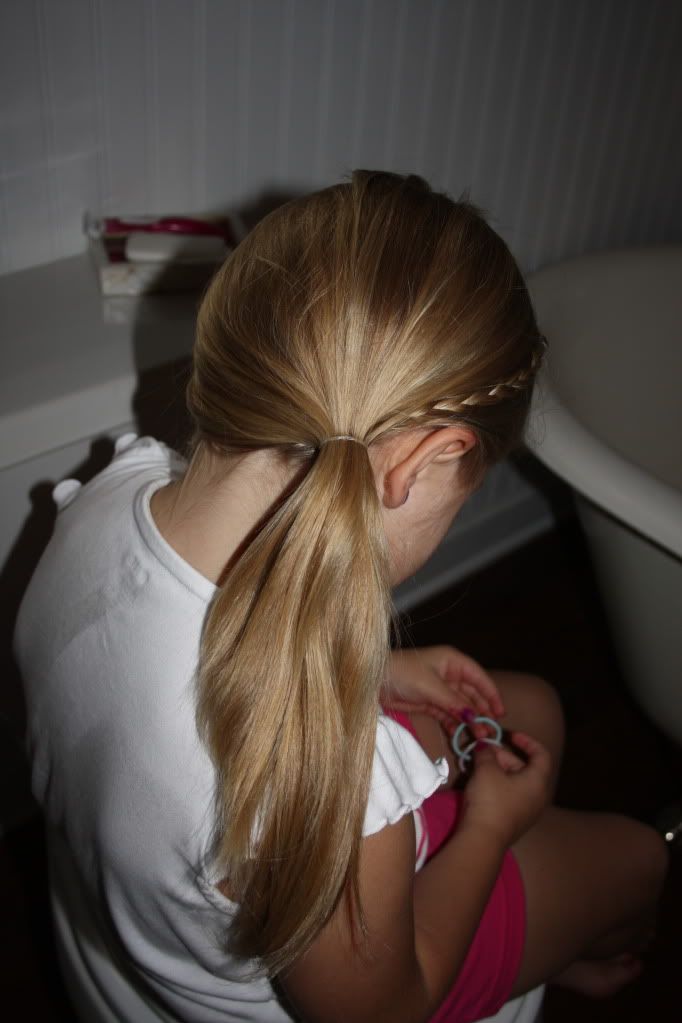
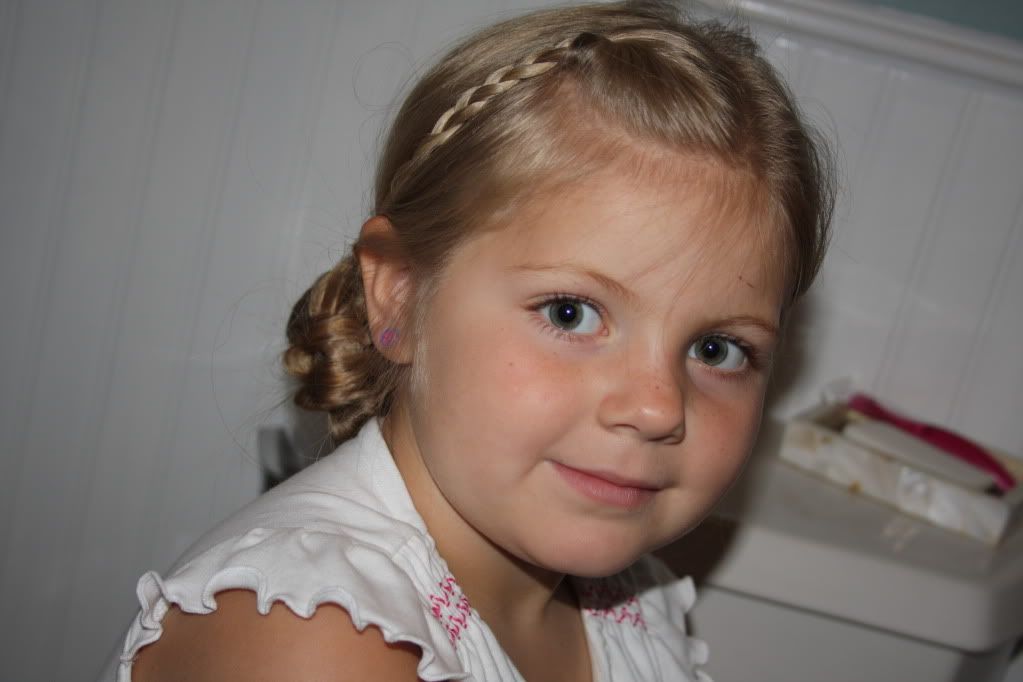
I did a braid in the front first because Kate's hair is fine and will come out easily. She doesn't like her hair in her eyes. She also wants to get her hair cut short, and I am trying to talk her out of it because she has beautiful hair:) Anyway...next step: separate the hair into two sections.
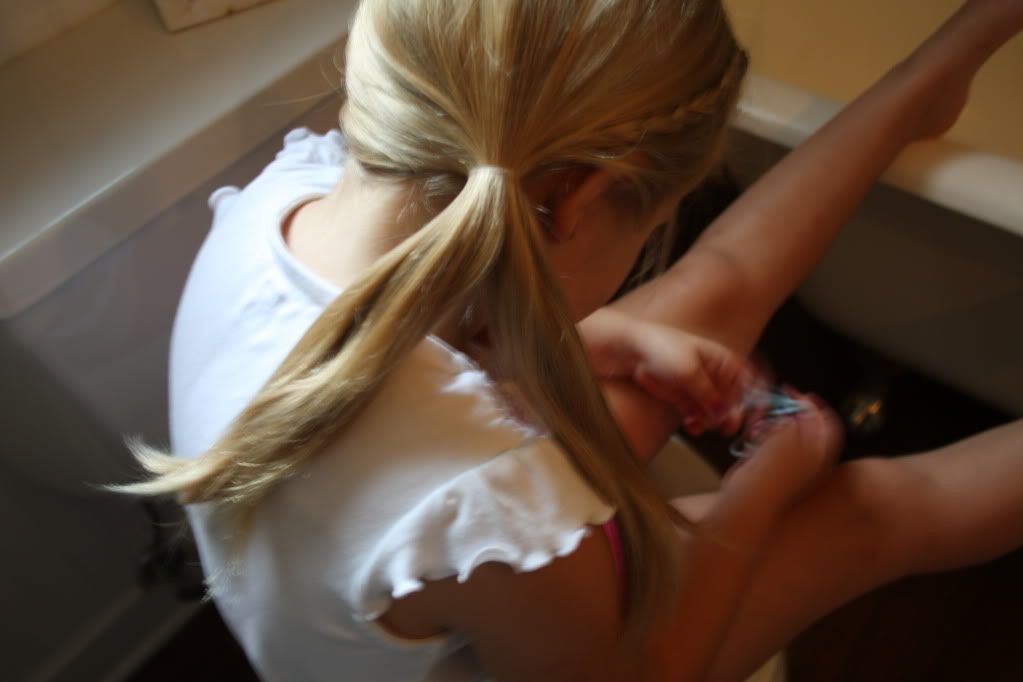
Then, get some thin ribbon and cut it a little longer than two times the length of the hair in the ponytail. Lace through the ponytail holder and tie it in a knot. Don't forget to tie the knot or you will have to do it again.

Separate each ribbon into the separated sections. Then do a loose braid with the ribbon in the braid.
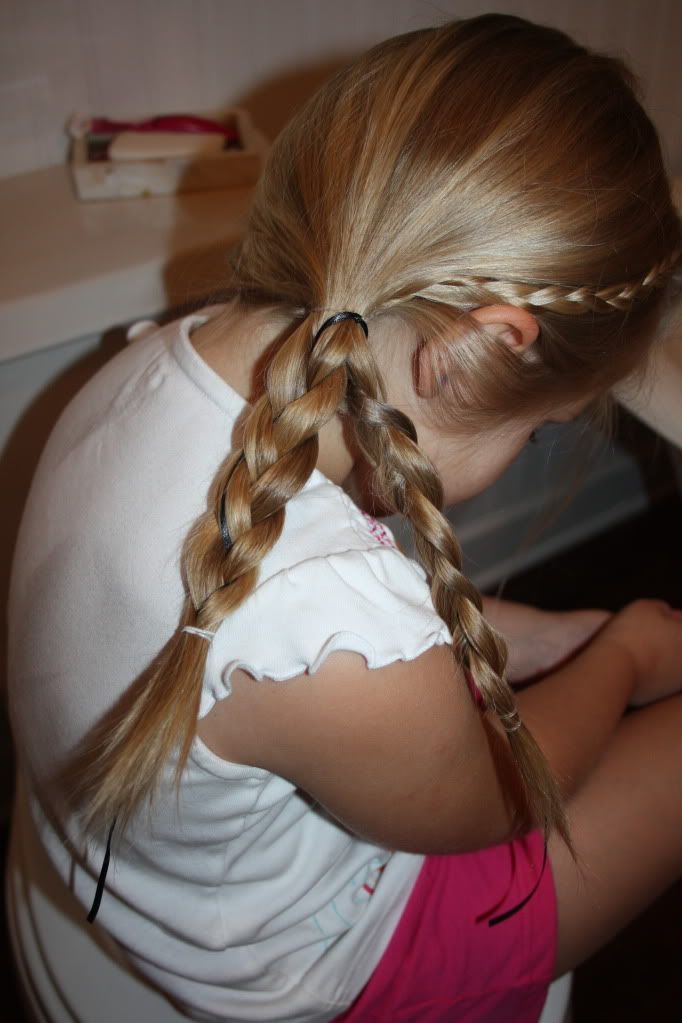
Next, hold the ribbon and push up the braid and pin with a bobby pin.
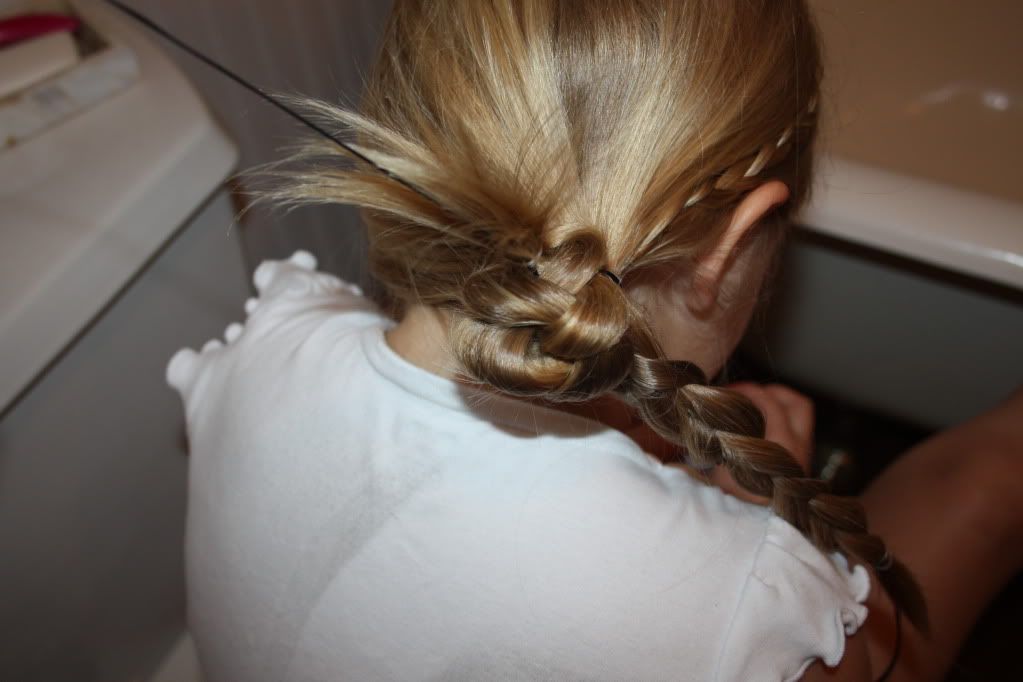
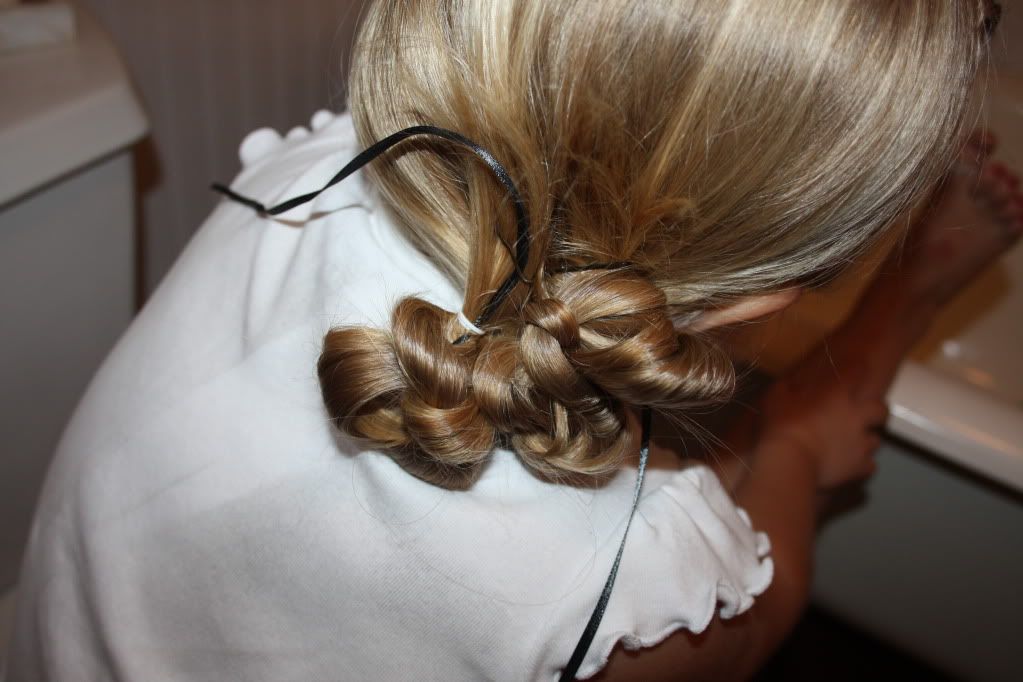
Next, start pinning the braids into place and trim the ribbon carefully.
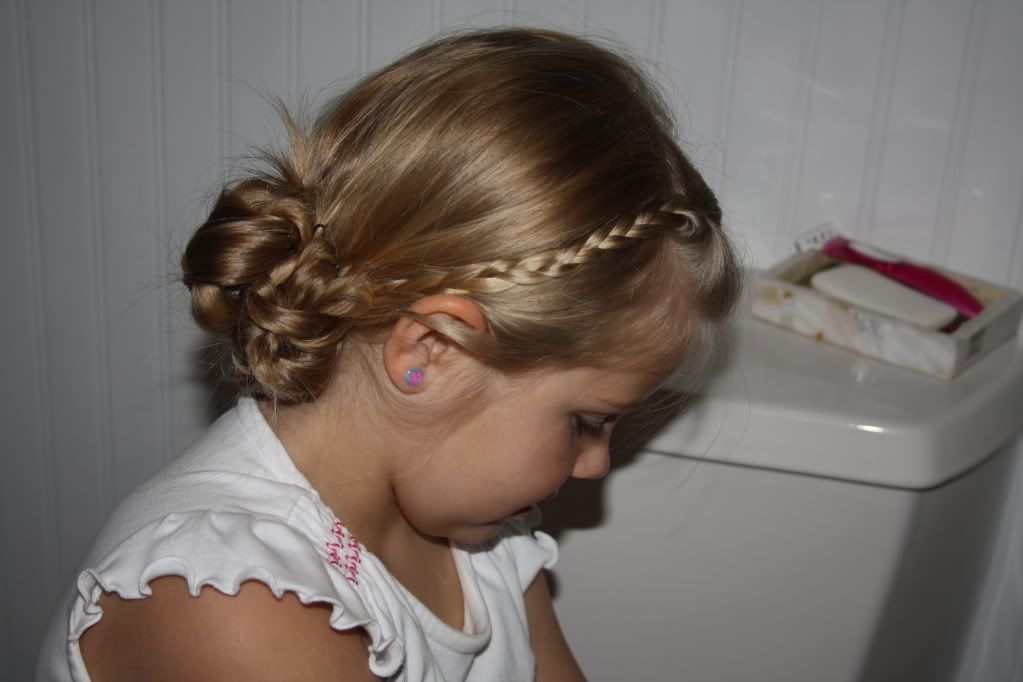
Here are a few more pictures of the hairdo...

It looks great with flowers in it too☺

Celia and I are symmetrical.
No comments:
Post a Comment