
First, get tissue paper. It is cheaper to buy this in bulk if you are making lots of these. I think it looks best to have more than one color. We used two shades of blue...
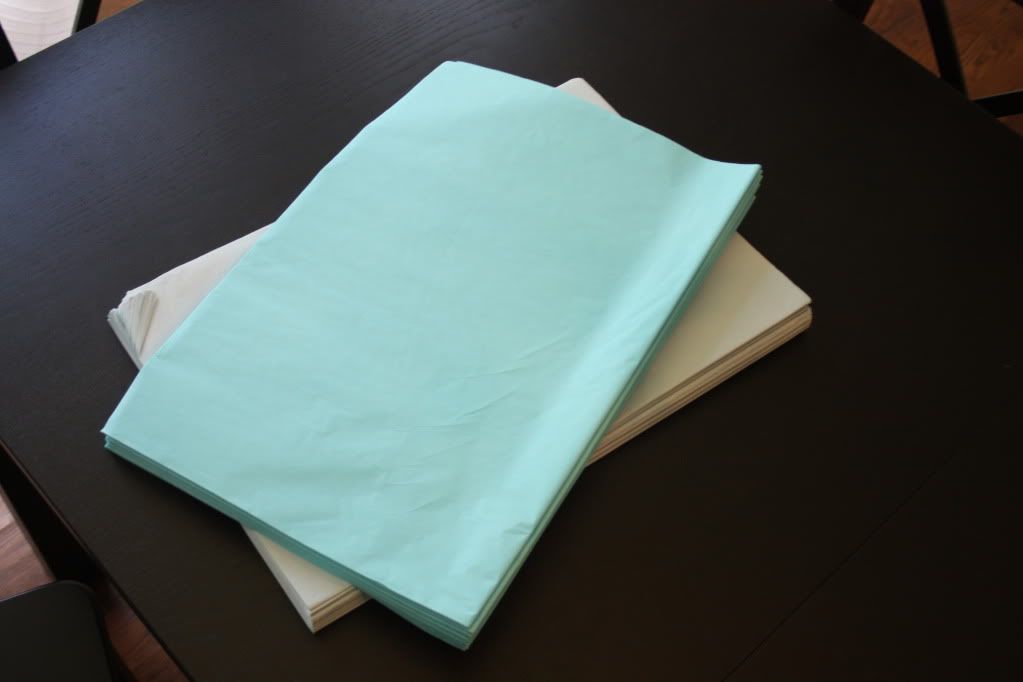
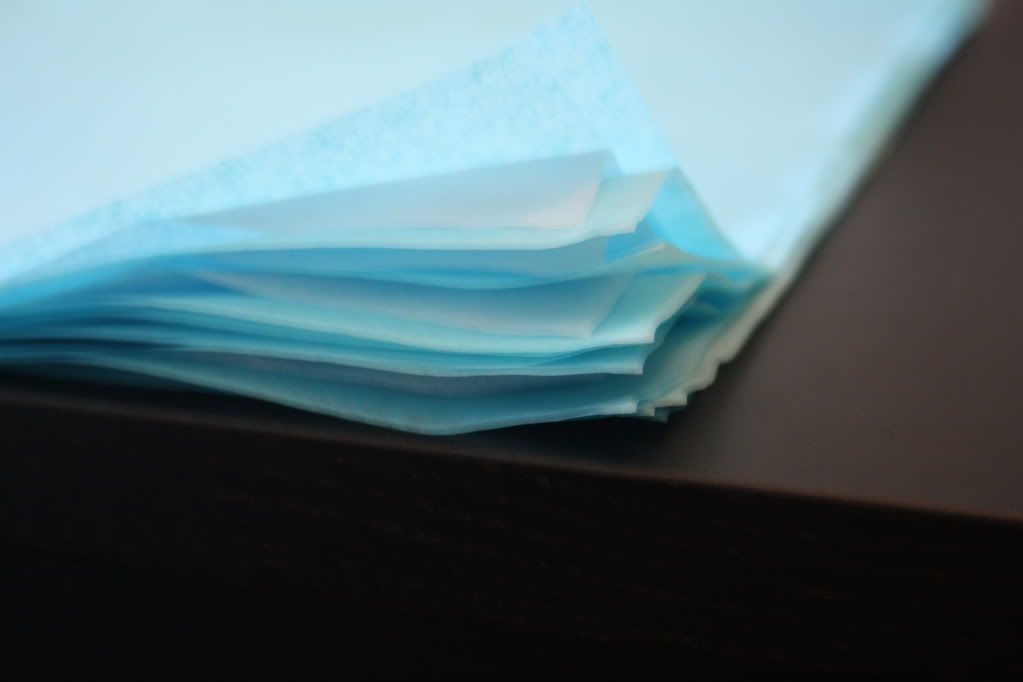
Lay out 18-20 sheets of tissue paper in a stack, alternating colors.
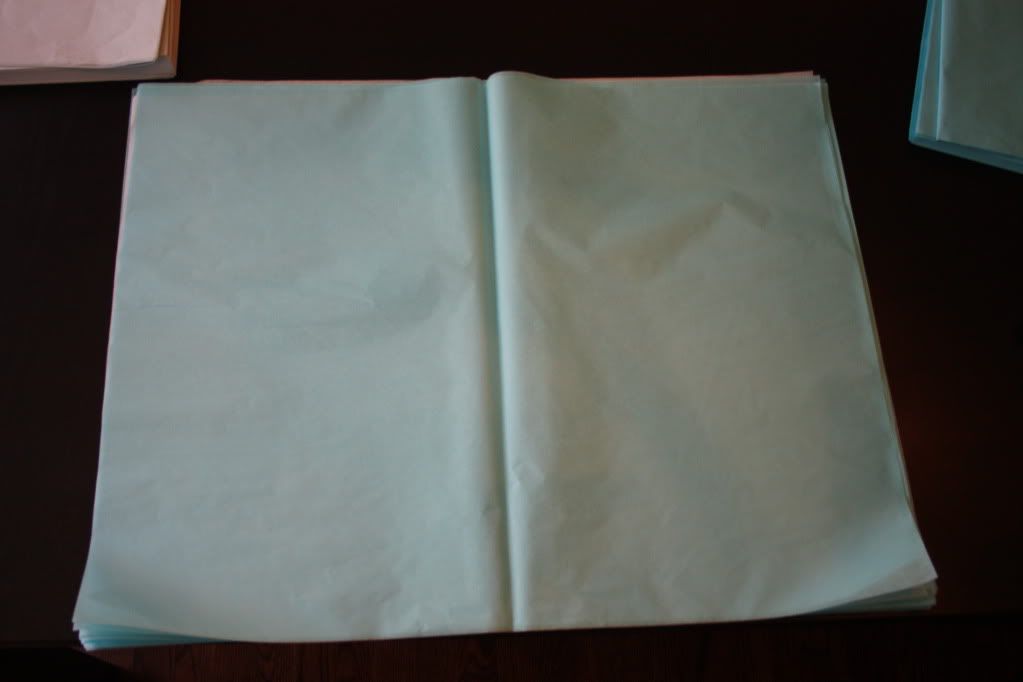
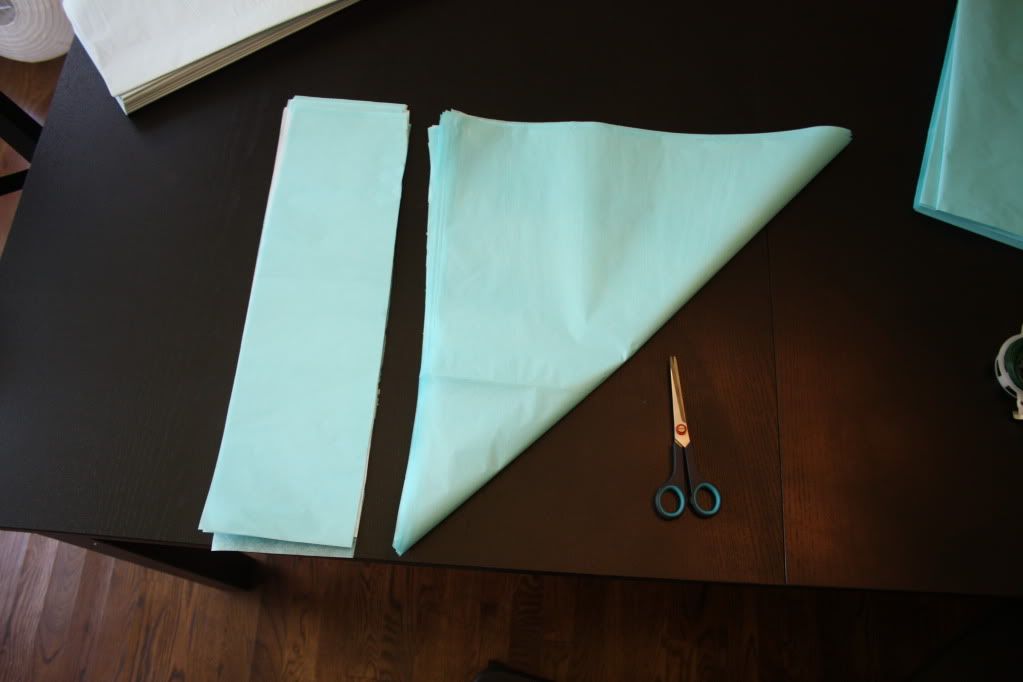
Fold down a corner so you can make it into a square...
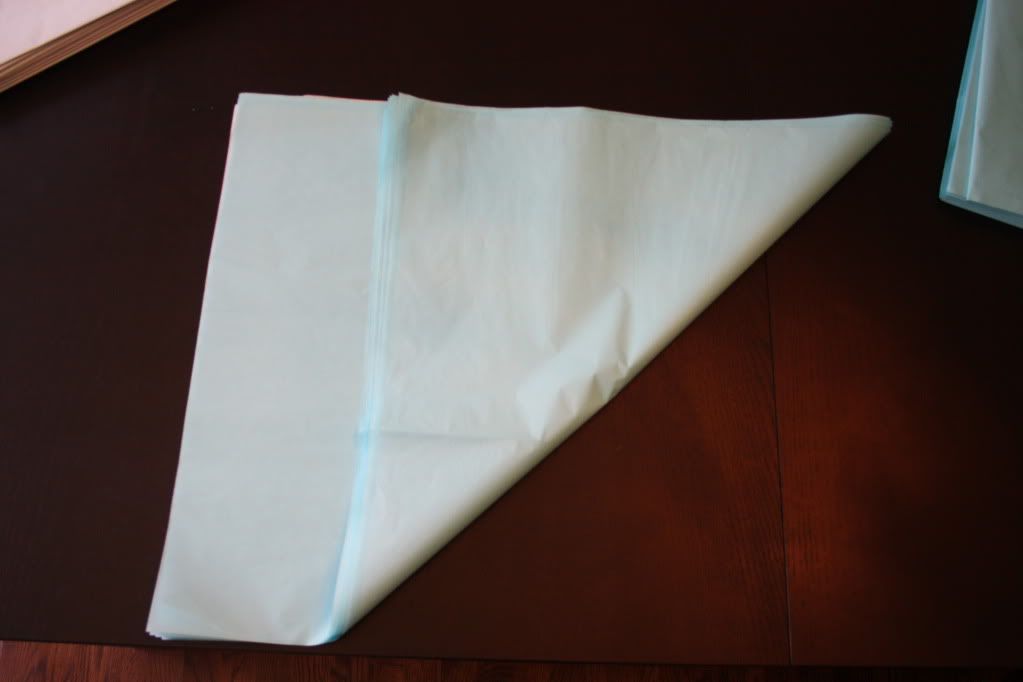
Cut off excess.
Lay tissue flat on table and start doing an accordion fold.
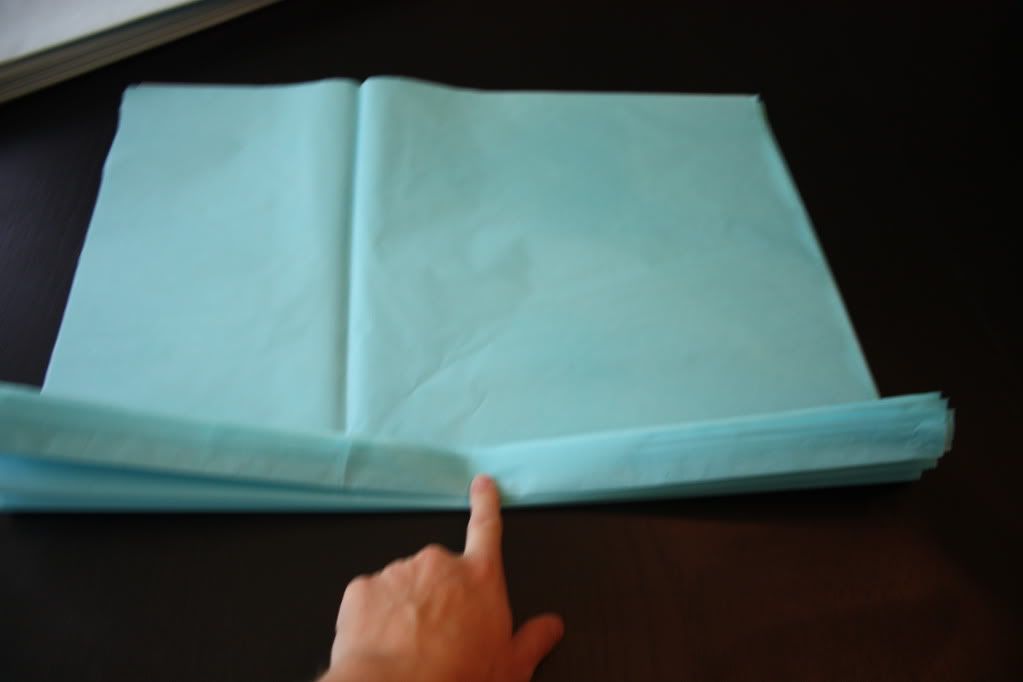
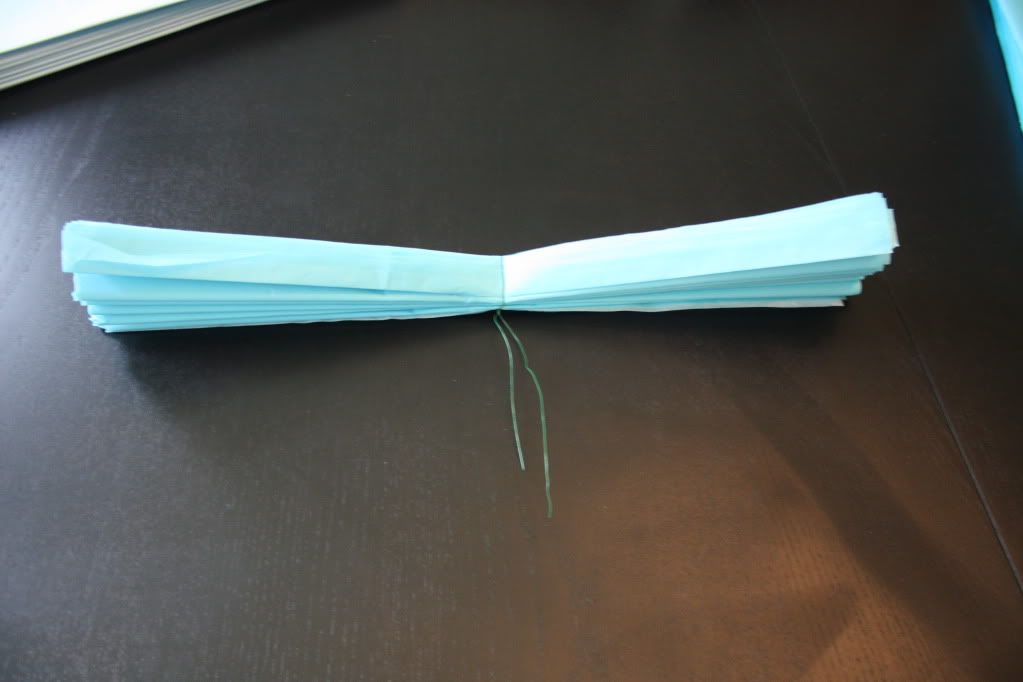
Wrap wire around center leaving extra to hang later.
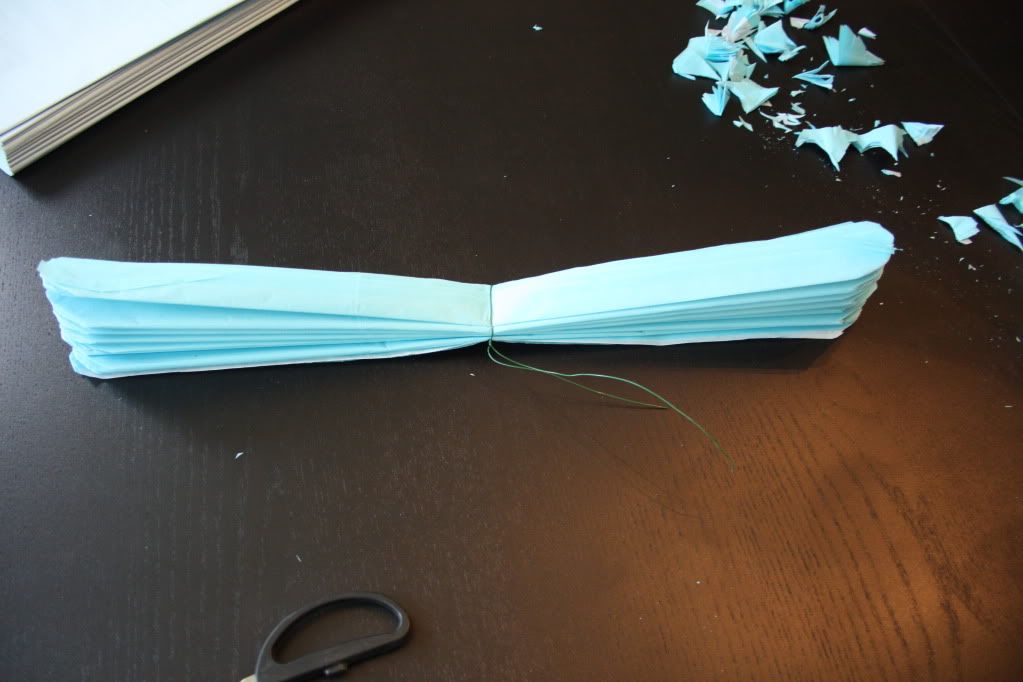
The next step is the worst...round the edges of the tissue paper. You will need GOOD scissors for this. Even still, you may have to cut one fold at a time. This step is crucial, though, so make sure you don't skip it.
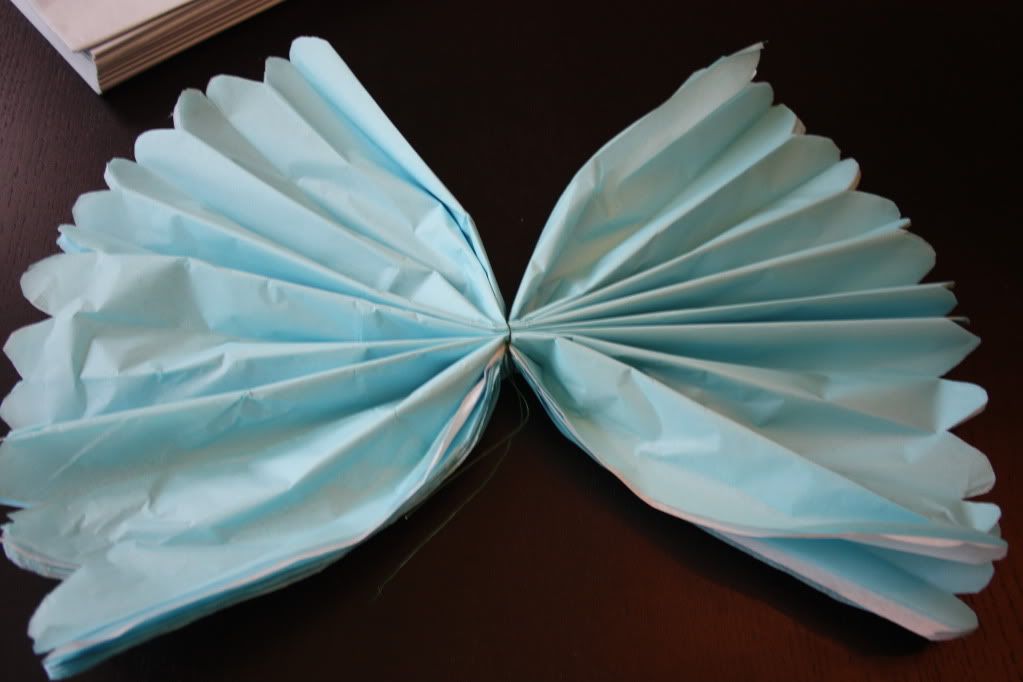
Spread the folds out.
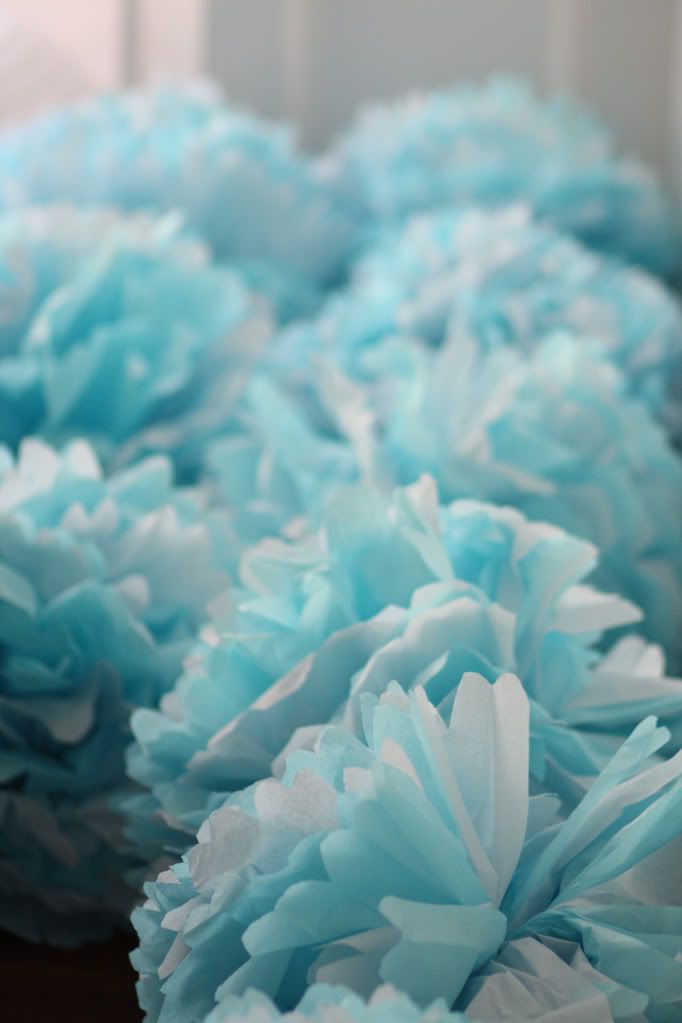
Start separating each layer. Be careful when doing this step because it can rip easily.
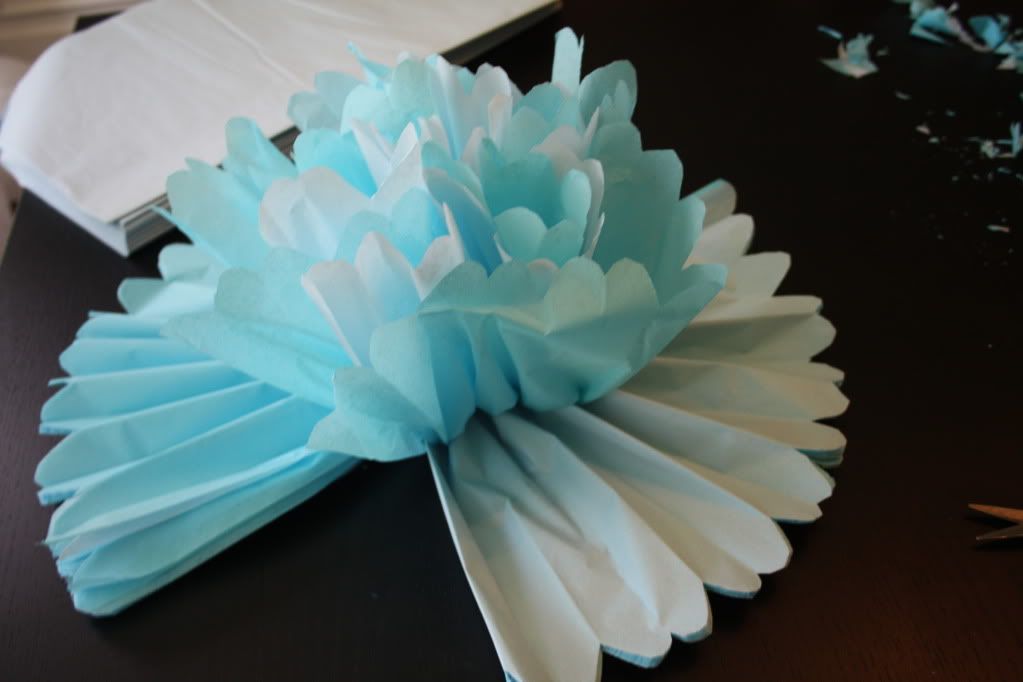
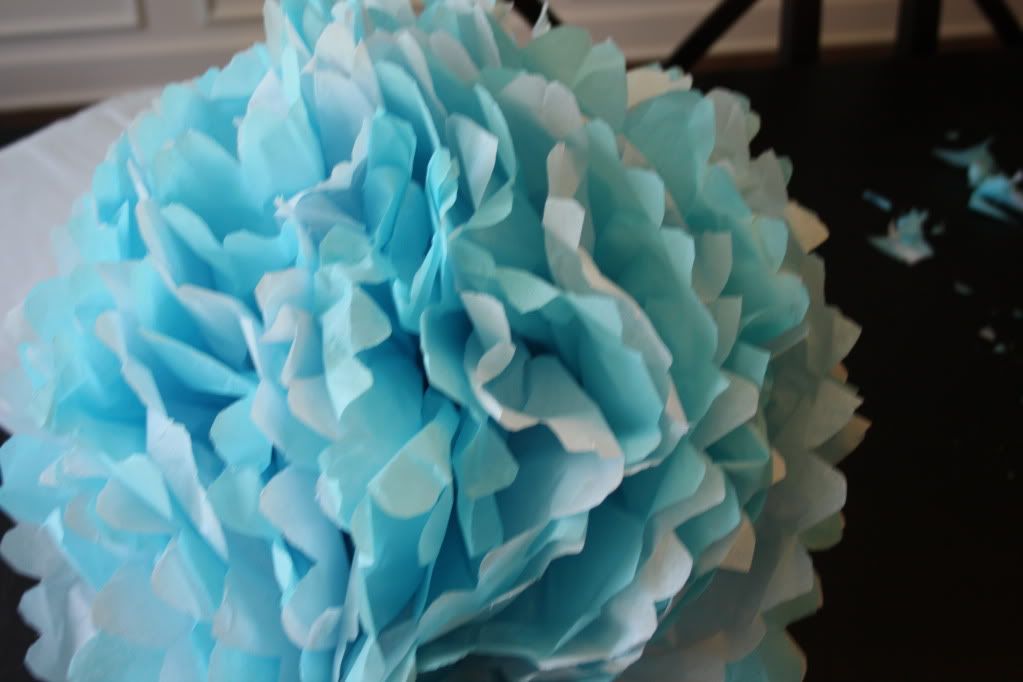

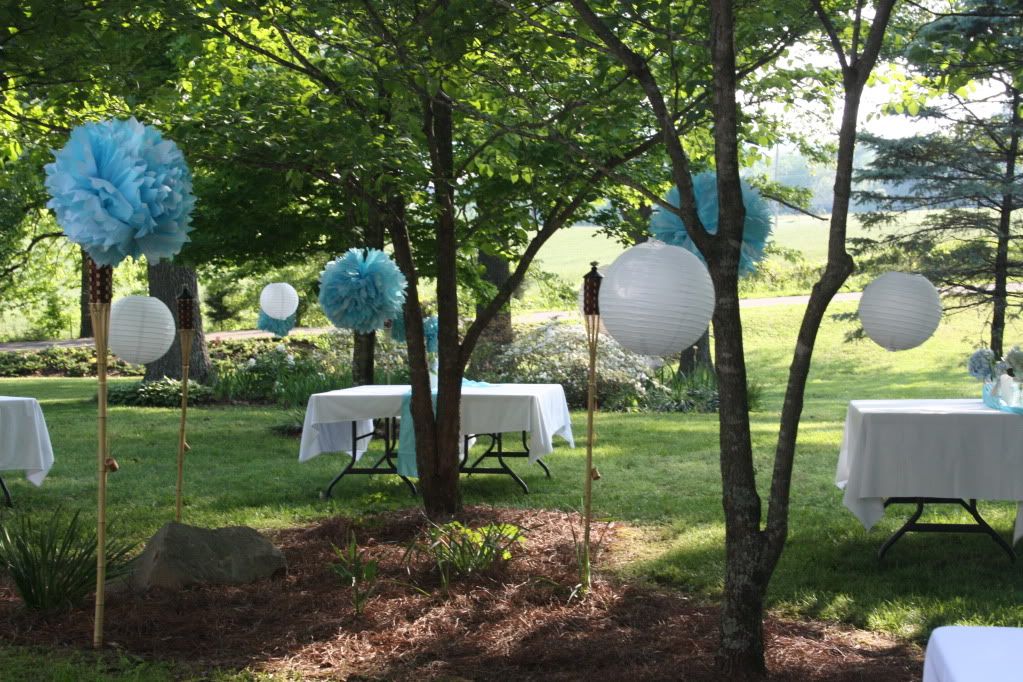
Do not stack them on top of each other because they will get smashed. It is also best if you make them ahead of time to hang them up so the bottom won't get too smashed as well. The last step is to find the wire inside and twist together to make a loop. We hung them all over the yard from the trees with fishing line. It is a beautiful decoration that adds lots of color. They remind me of the tissue carnations that were sold at Opryland. I loved those things, but my mom wouldn't let me buy them. lol.
You are wonderful:)
ReplyDeleteThanks for posting this! I am actually going to be making these for my wedding! Now you have saved me the trouble of figuring out how to make them!
ReplyDelete