
This is the first quilt I have made start to finish. I have pieced together a few and had someone else to the binding and quilting. This one was really simple to make and I did almost all of it in just one evening.
What you need:
1. Fabric:
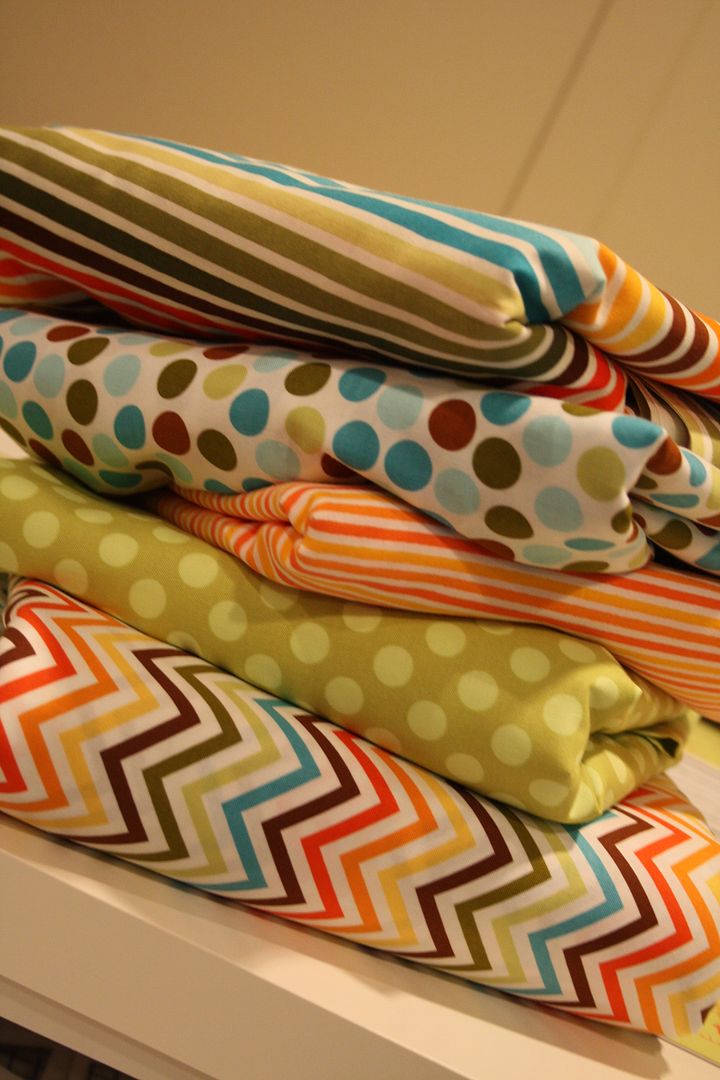
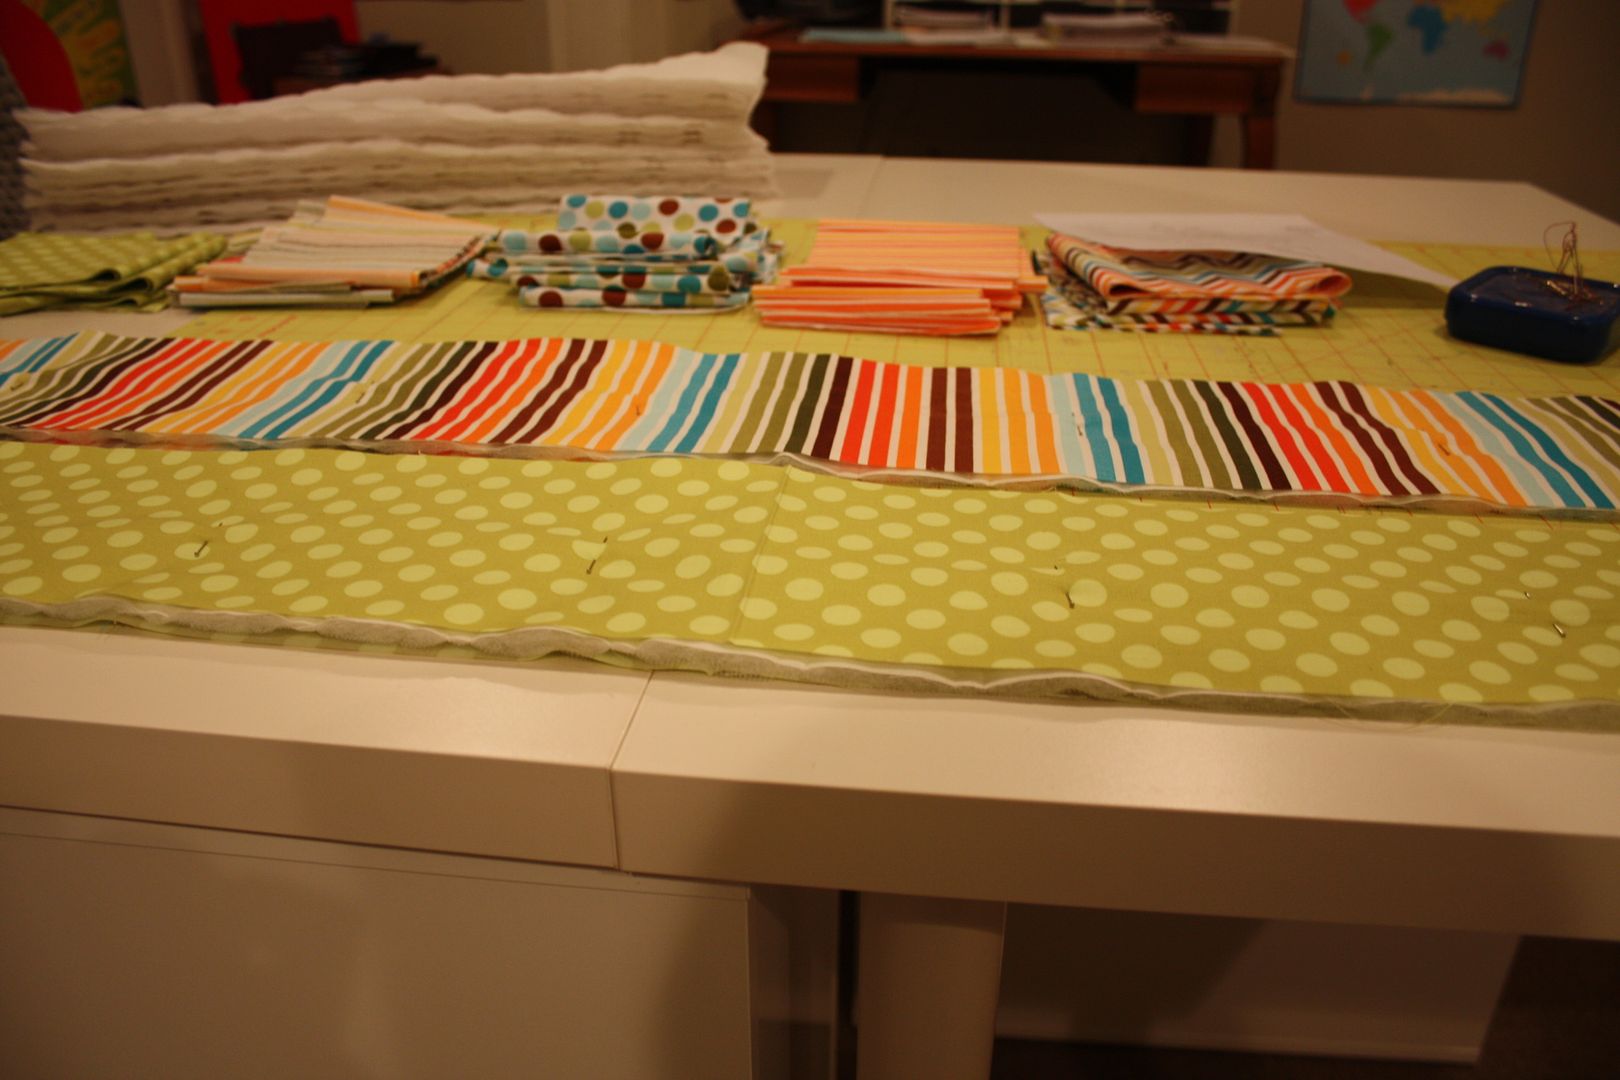
First, you need to decide how many different patterns you are going to use to determine how much you need. I used five different fabrics for my project. You need 2 yards for front and back (4 yards total). You may use a little bit more from one fabric depending on the pattern you lay out.
2. Batting:
On some tutorial videos that I watched, they used flannel for their fabric and muslin fabric for their batting. Since I used cotton for my fabric, I wanted something a little thicker. I used quilted batting, which later caused lots of extra work. In the end, I think it was worth it because I like having a thicker, puffier look to the quilt. You will need 2 yards.
3. Basic sewing supplies
How to make it:
Step 1:
Get your fabric ready to cut...
Step 2:
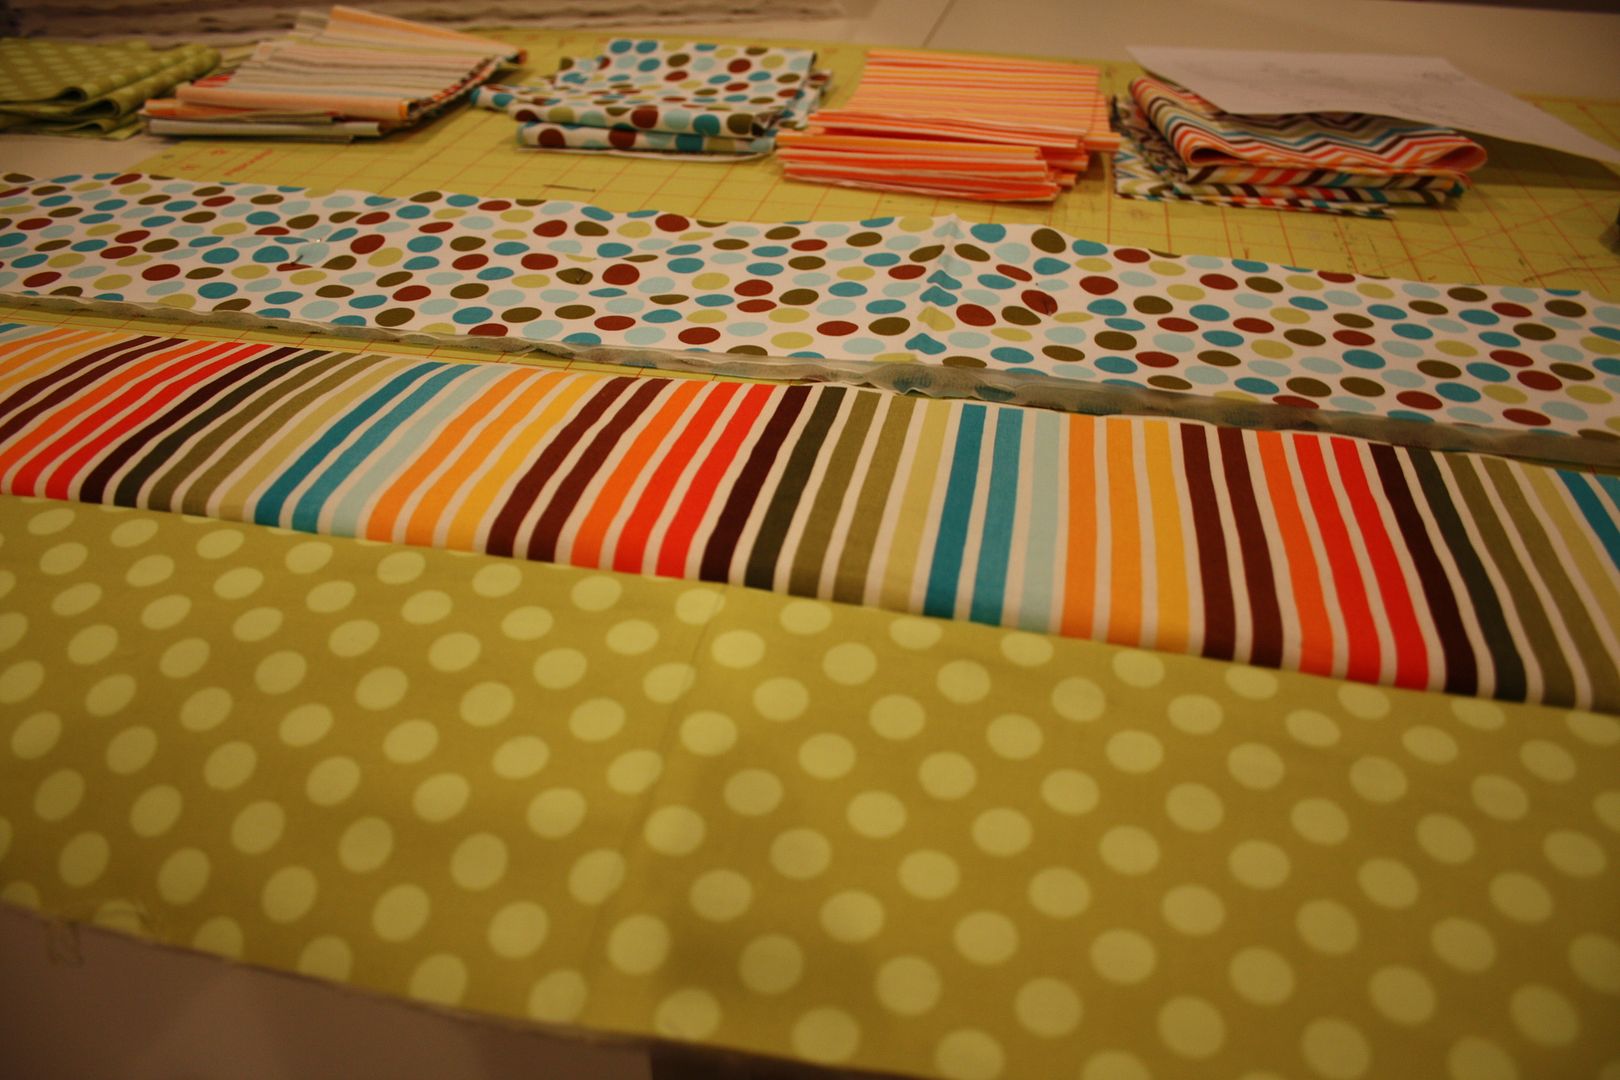
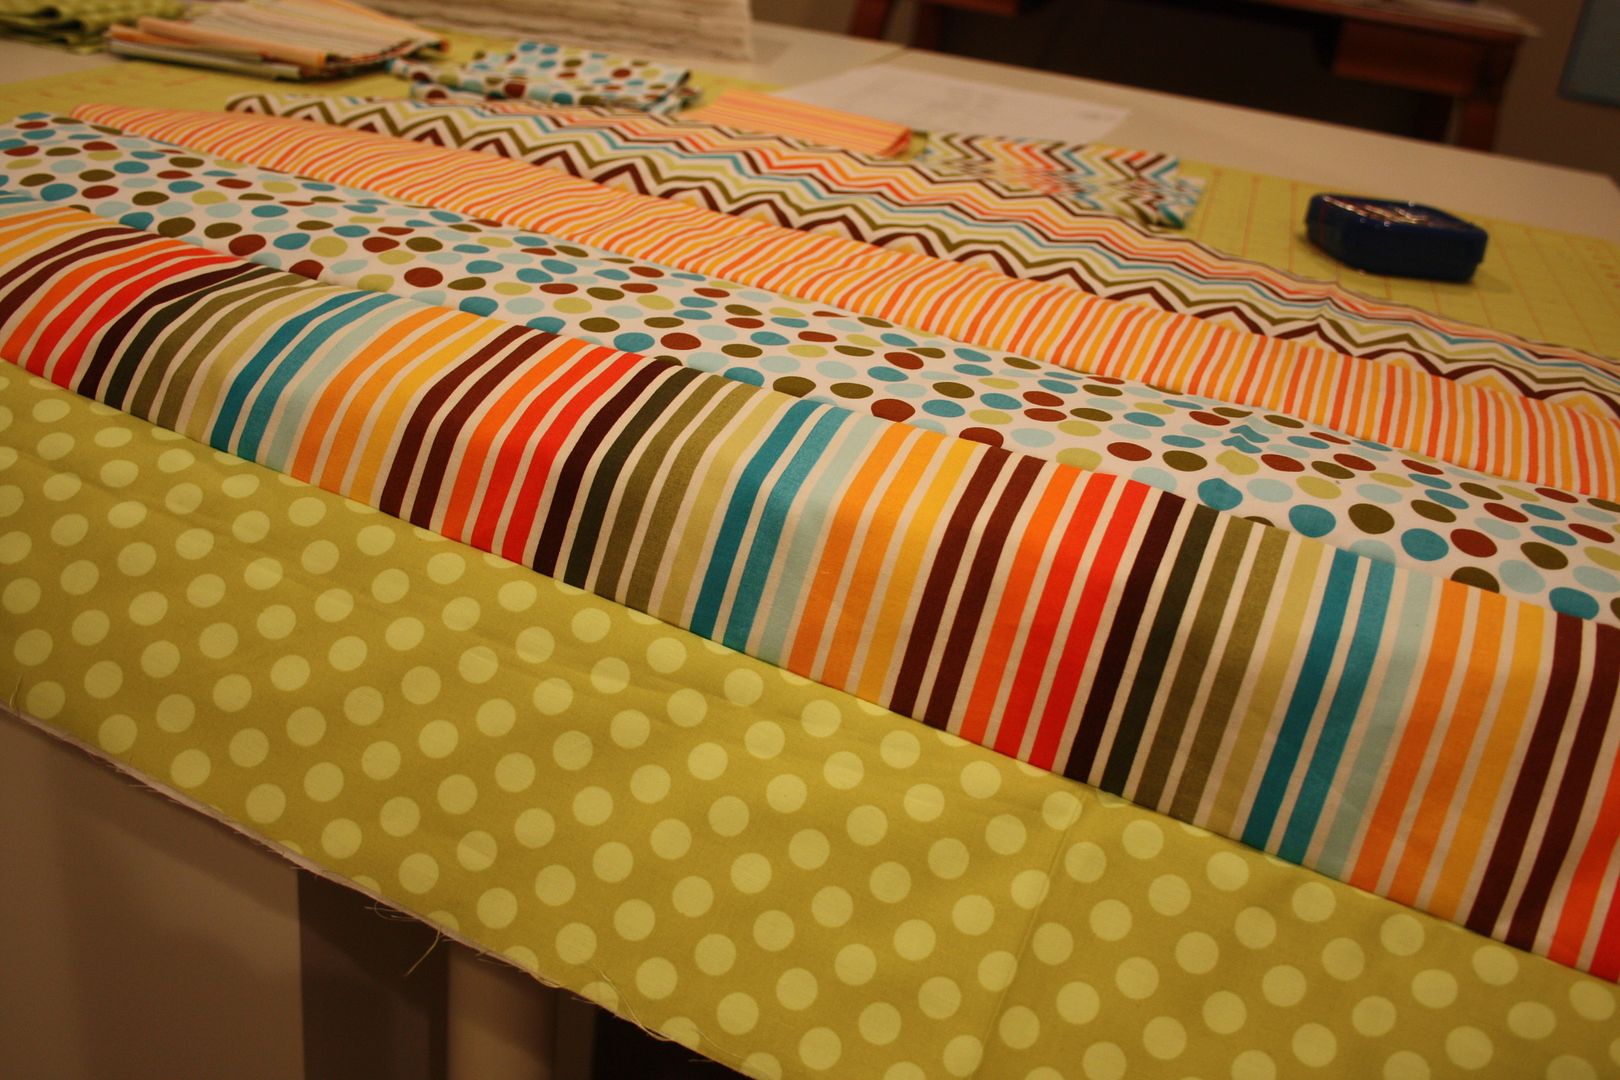
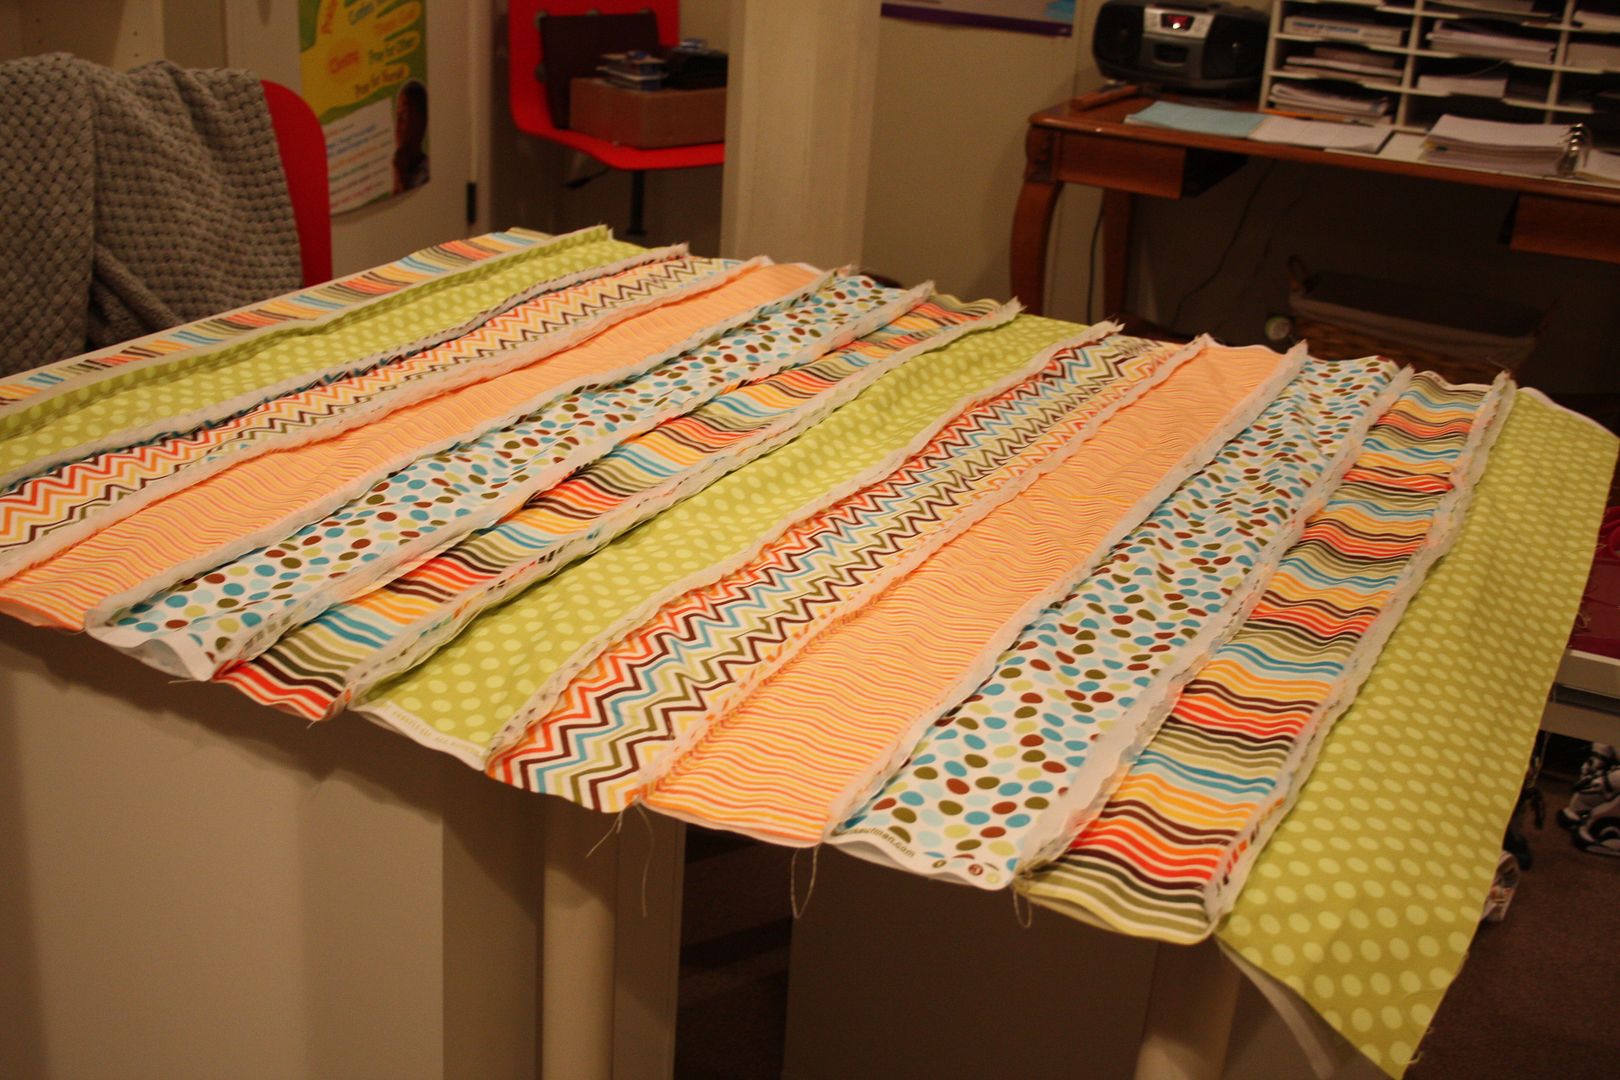
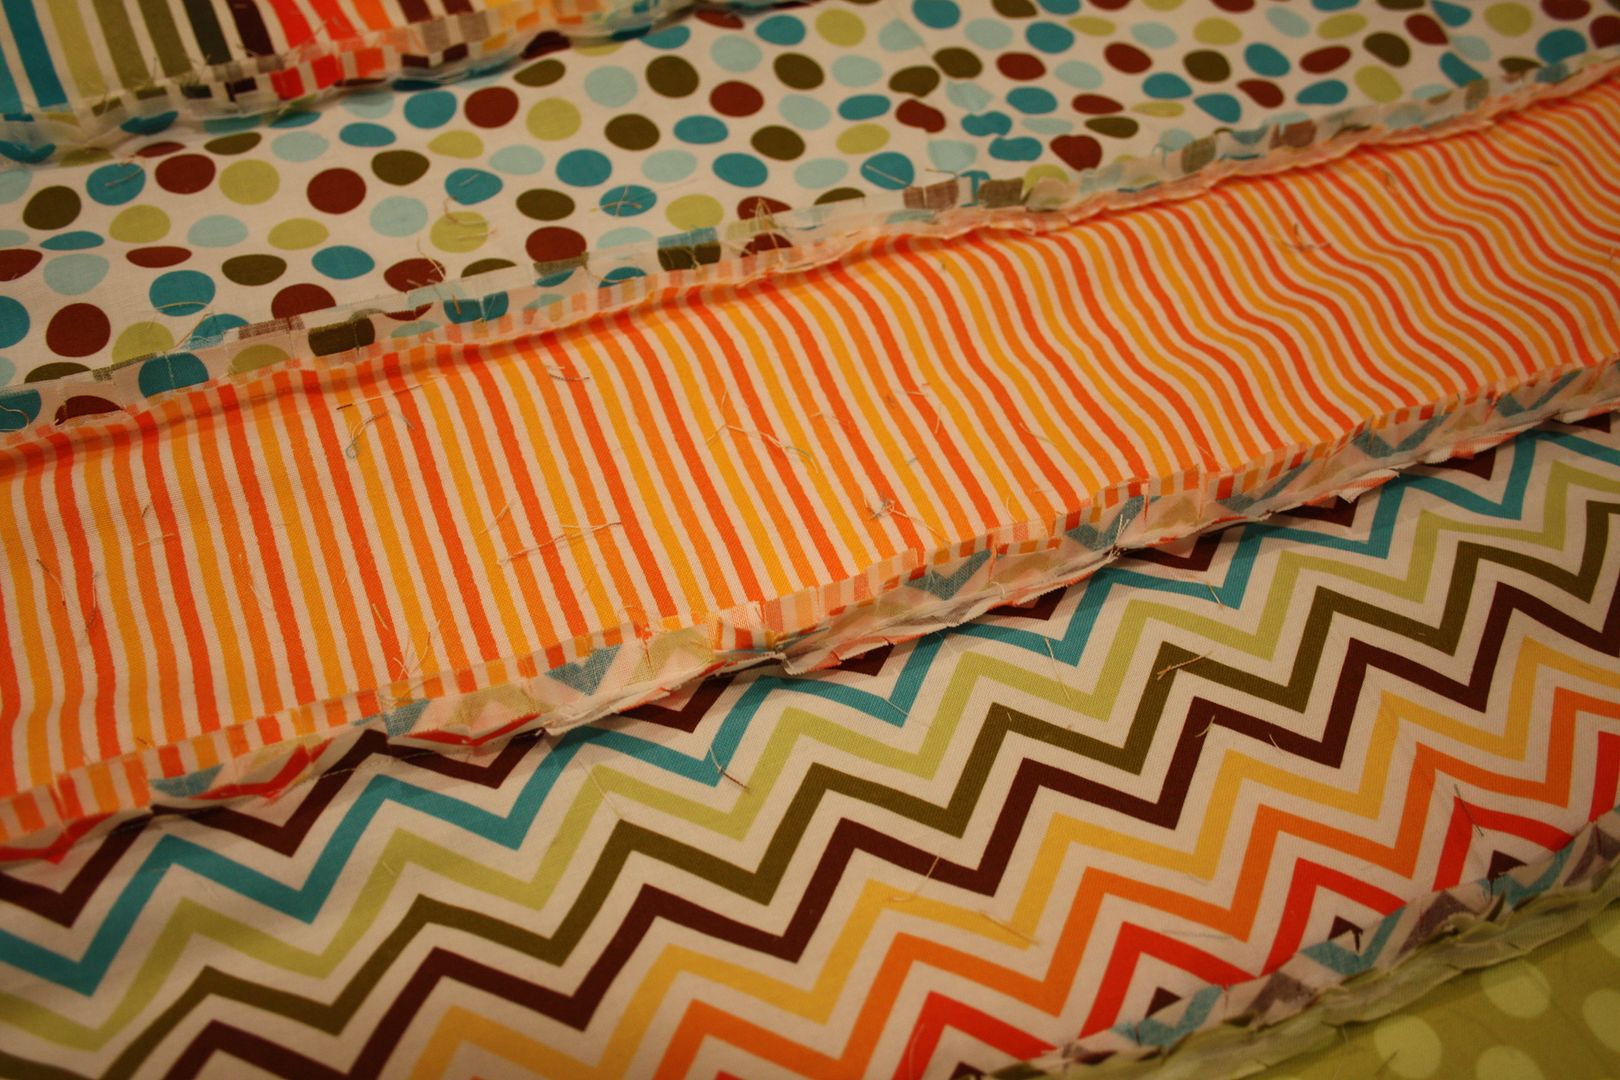
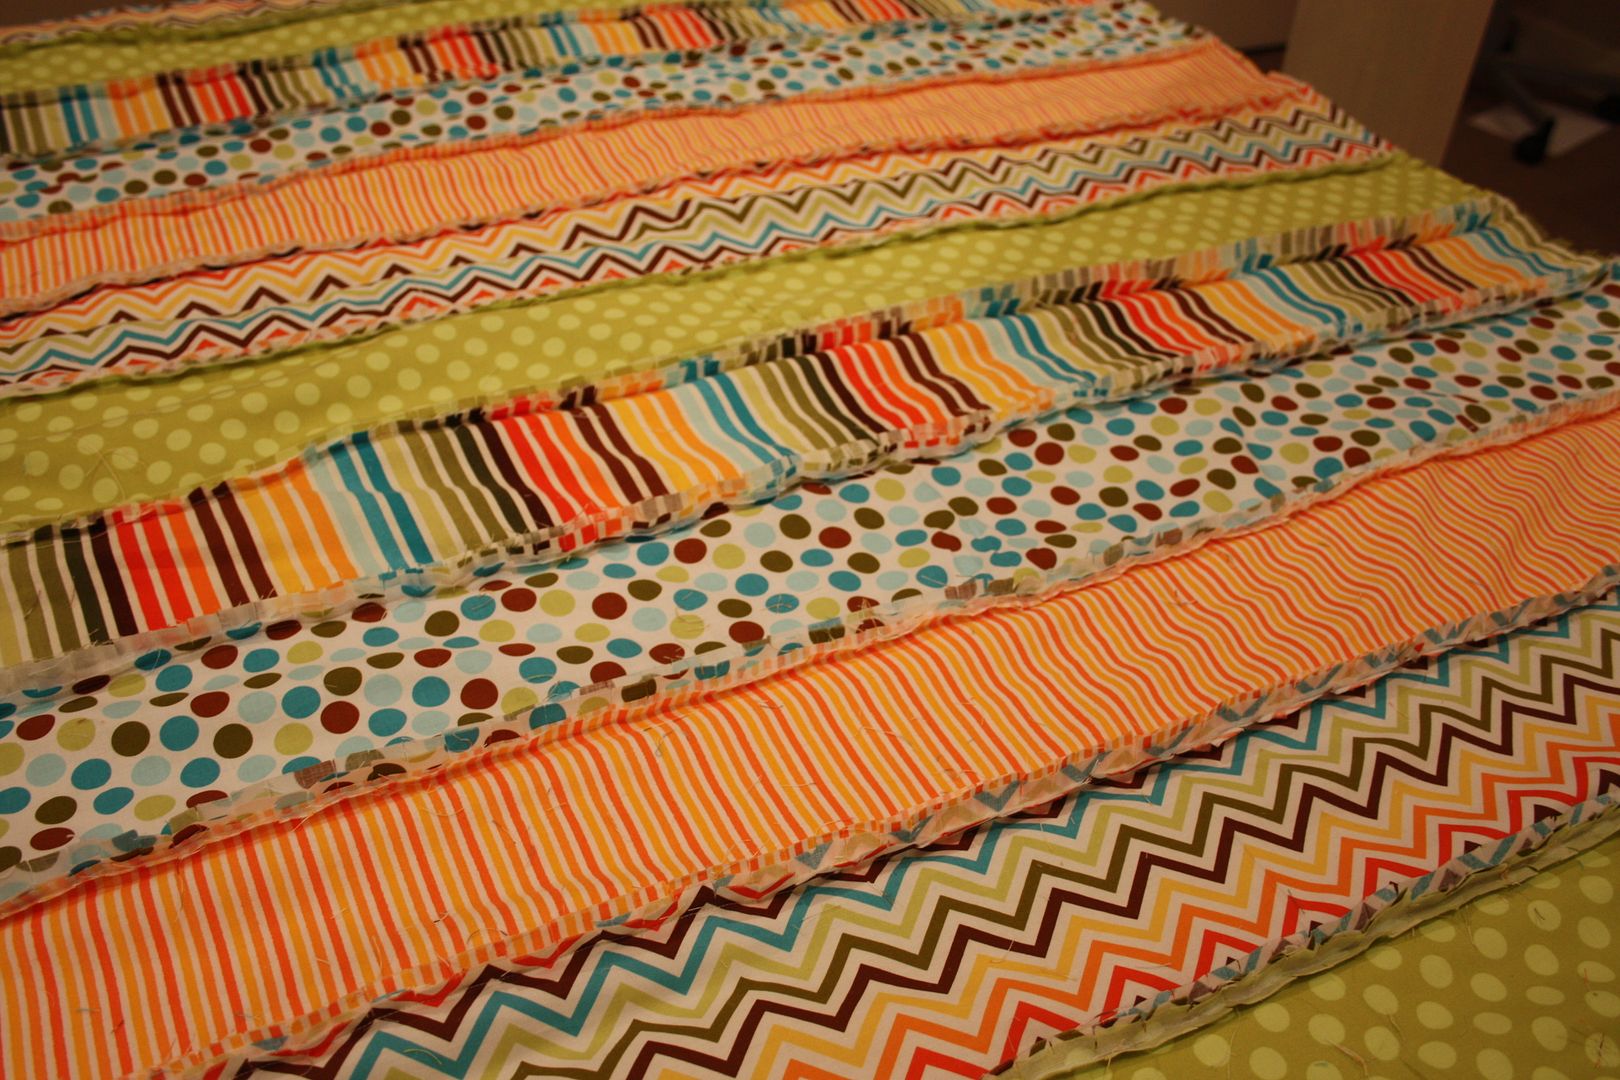
Figure out how you want your patterns to be sewn together. I had two stripes and two polka dots, so you need to plan out how you want your quilt to be so you like the patterns together. I made a simple sketch to plan it out.
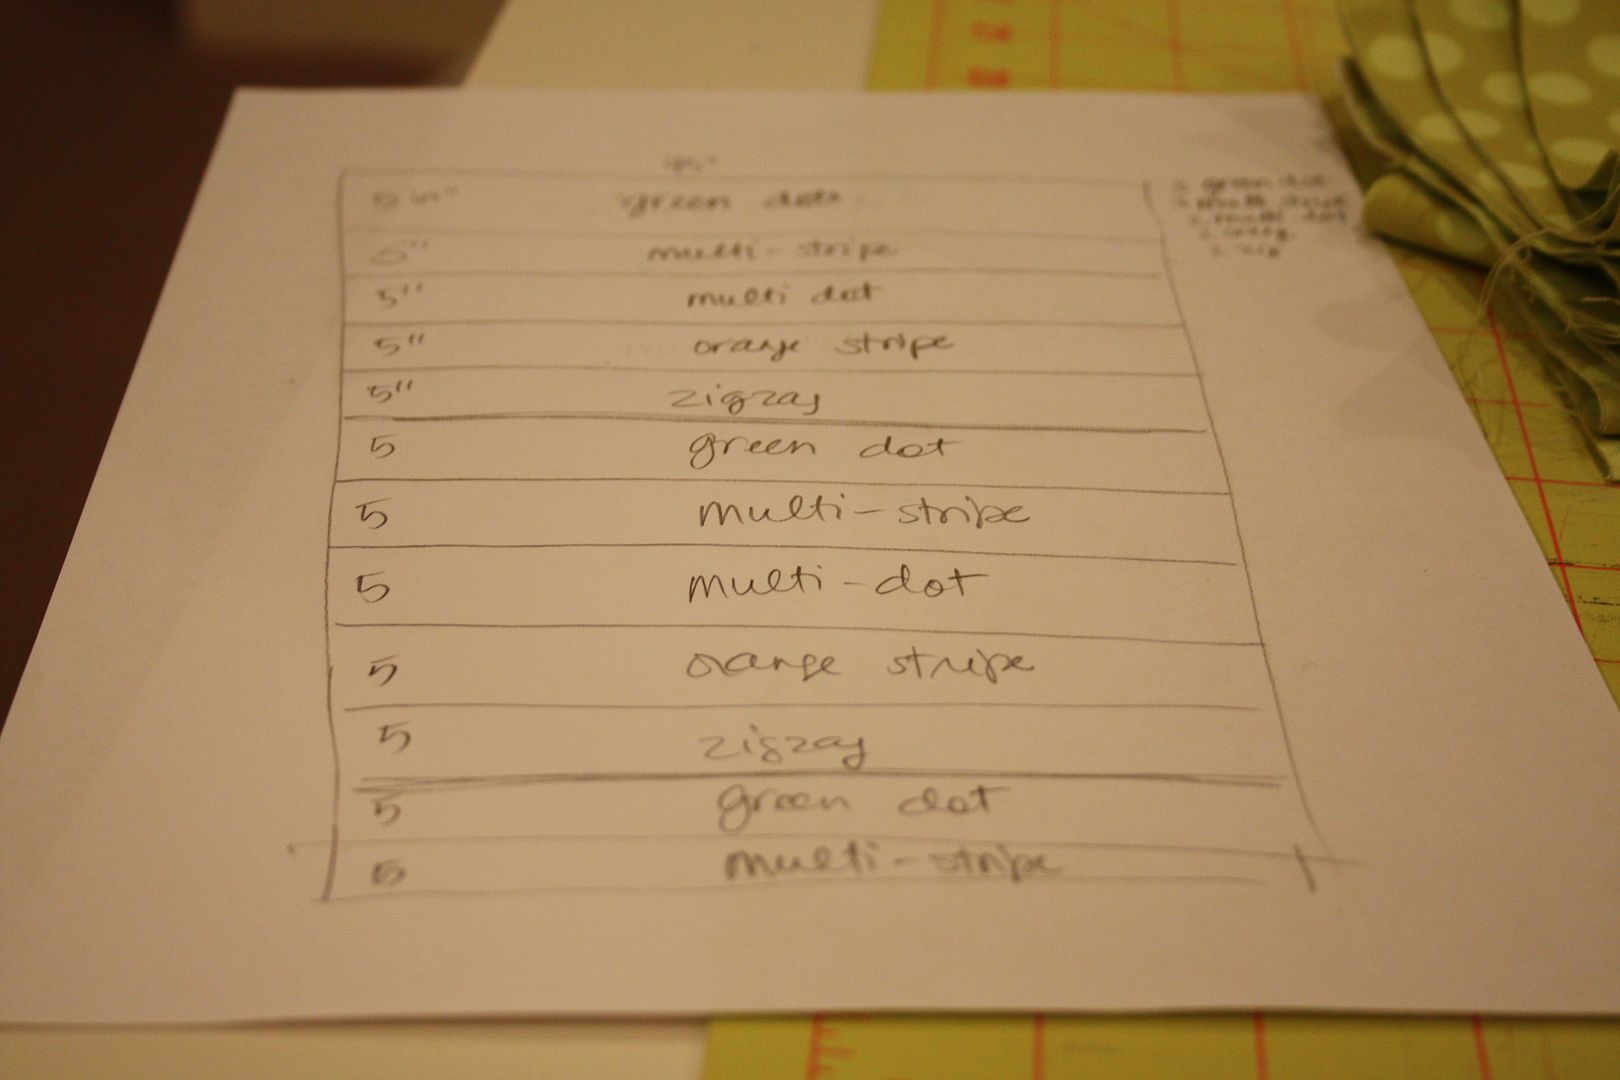
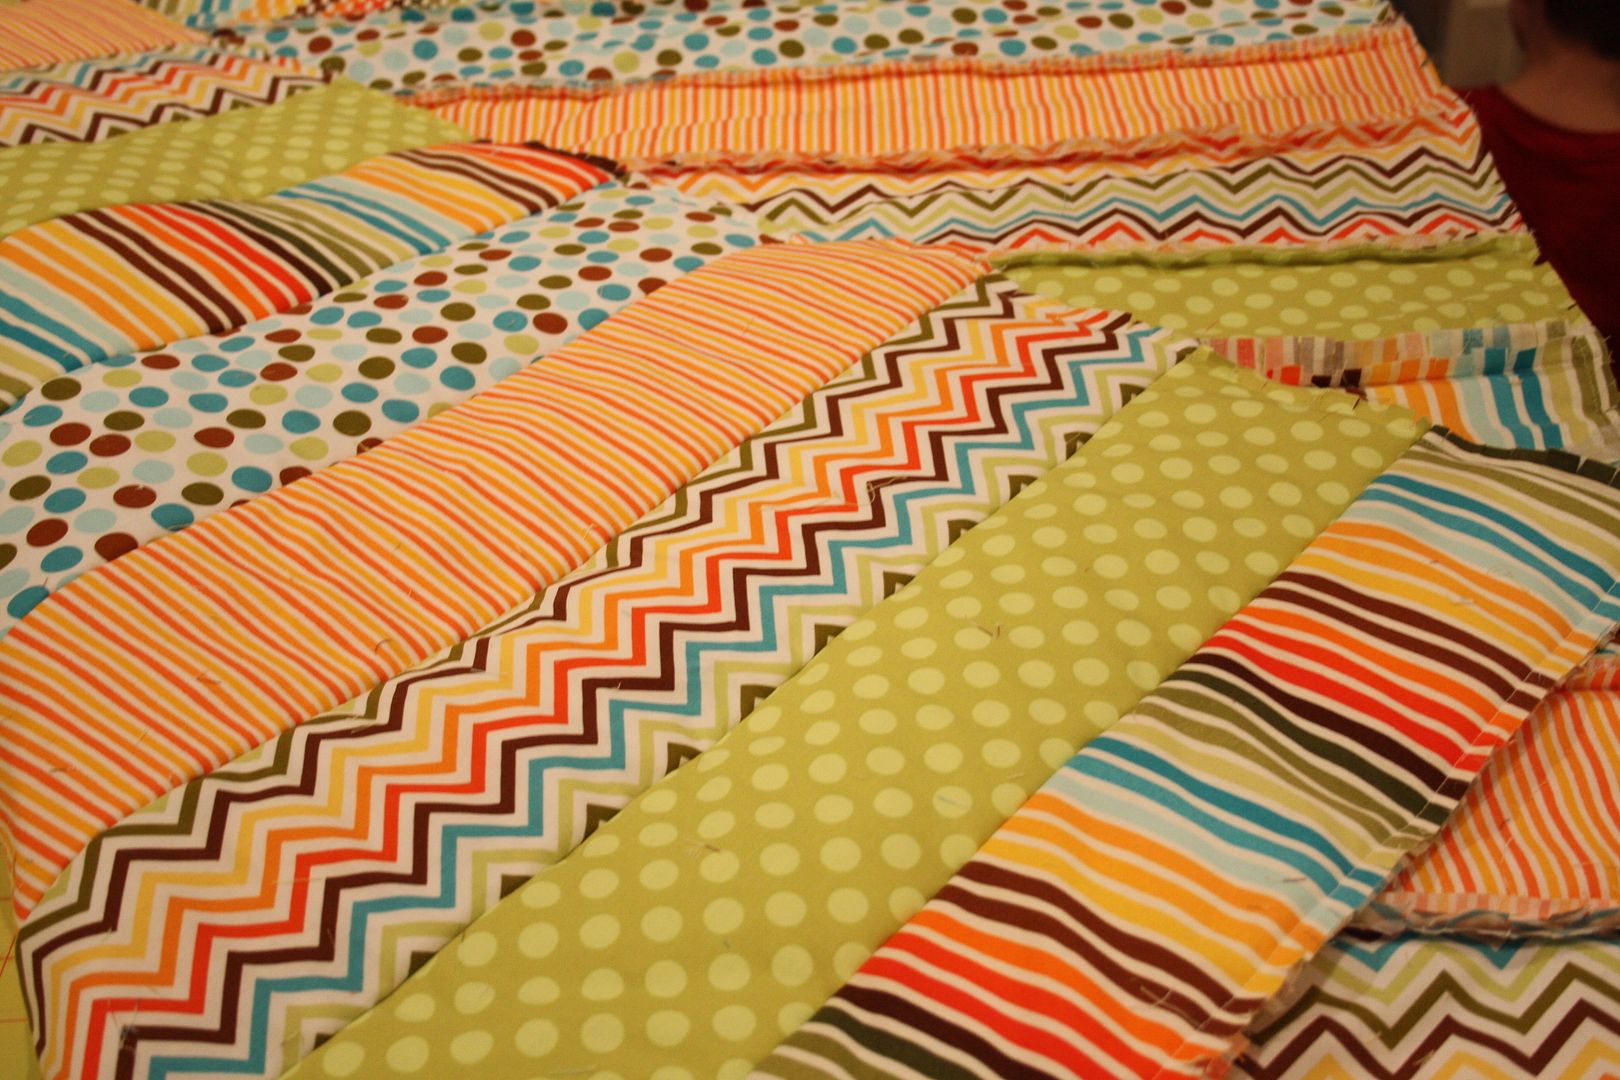
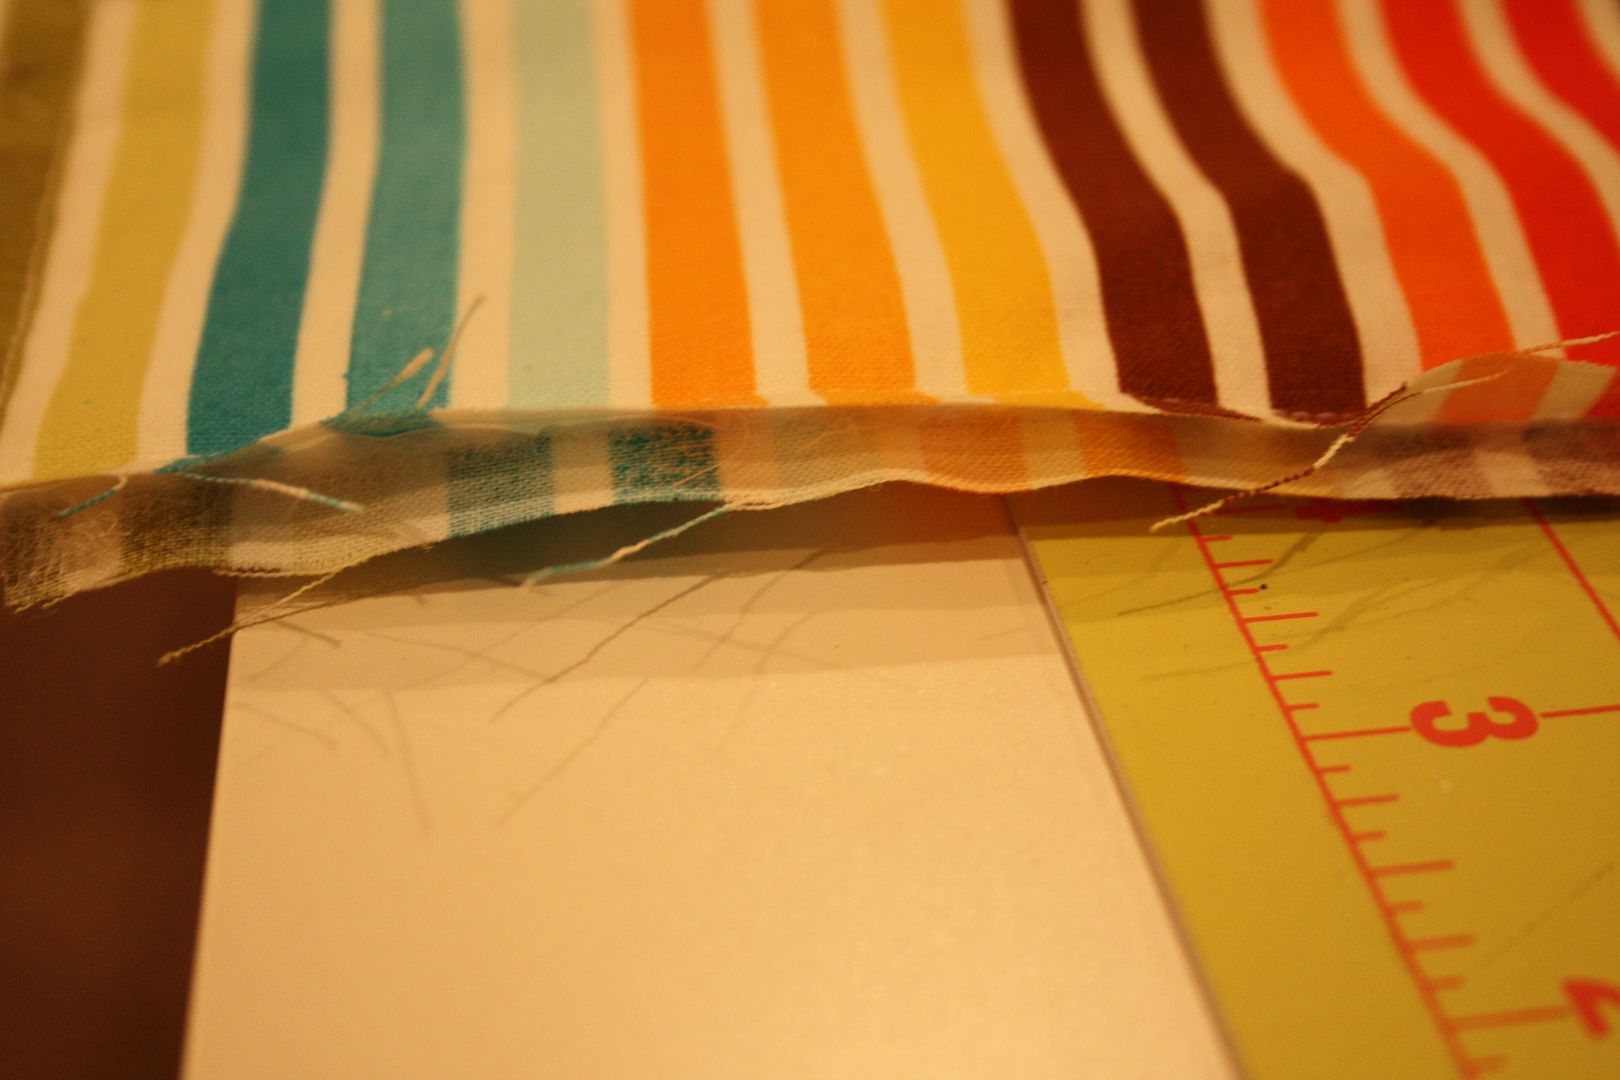
Step 3:Time to cut! I cut 5 x 45 inch strips. I planned on 12 strips originally, but when I got to the end, I added one more. You may also want to do different widths, but I chose to keep it all the same.
You will need one strip for the front and one strip for the back, so total I cut 26 strips.

Step 3:
Cut out the batting the same size as the fabric strips. I cut 13 total.
Step 4:
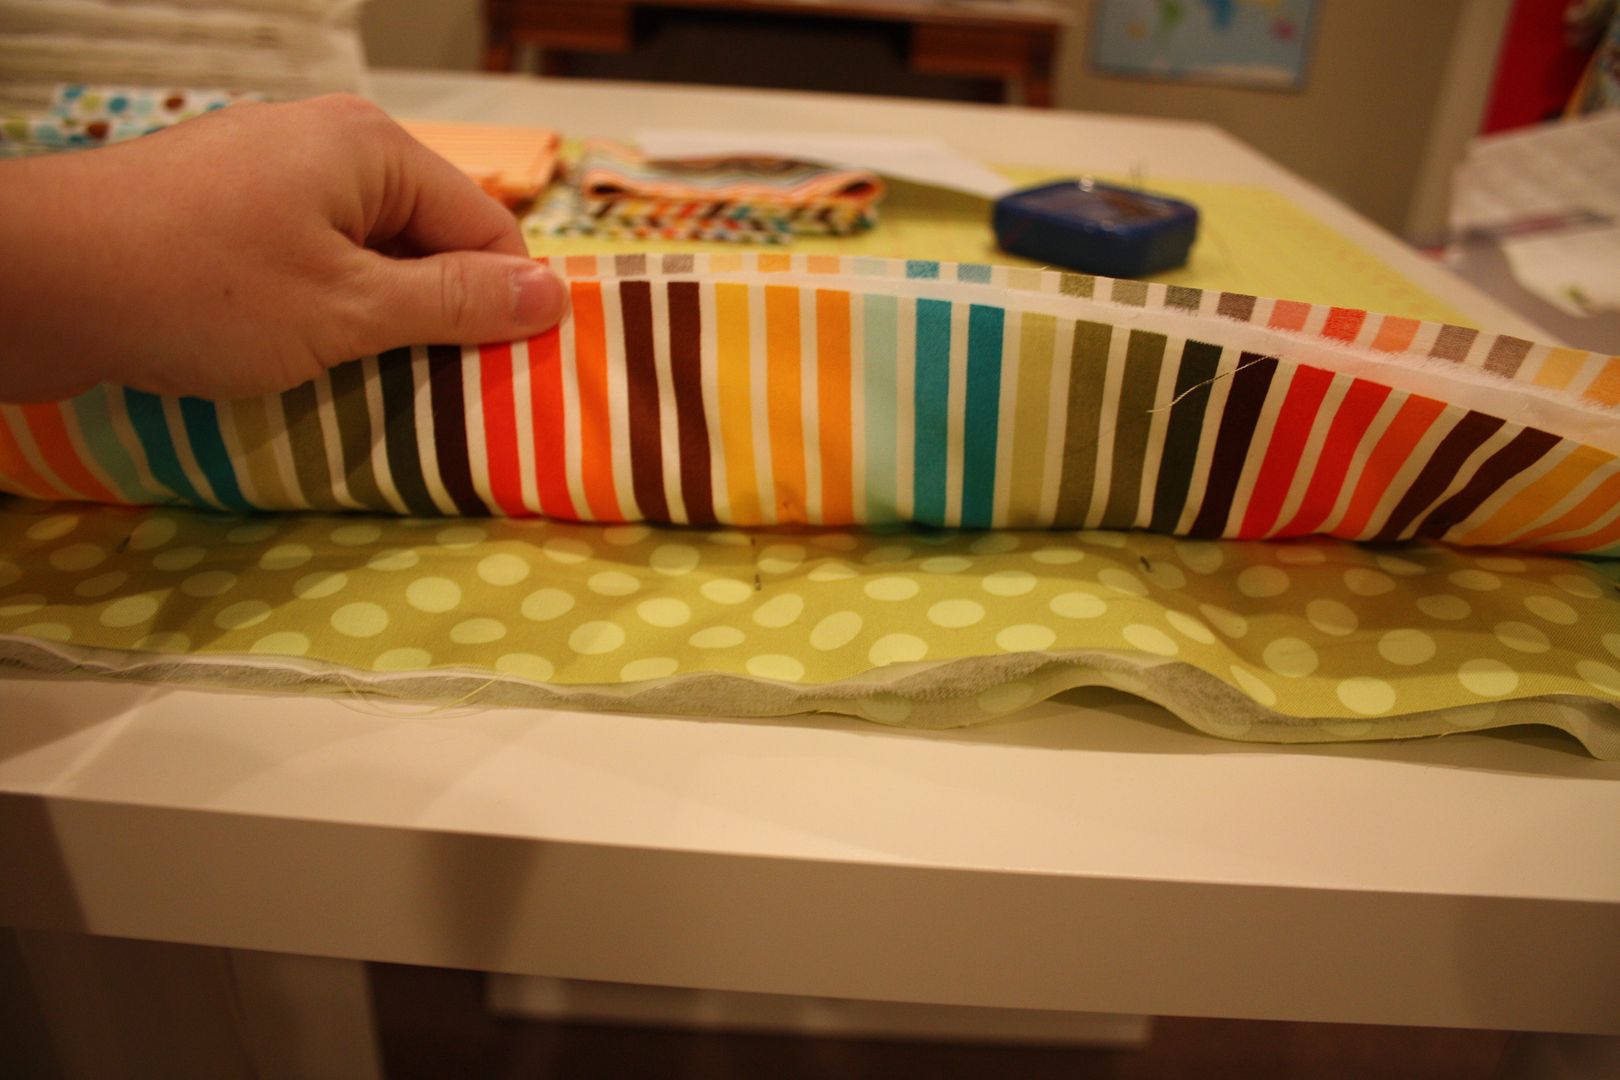
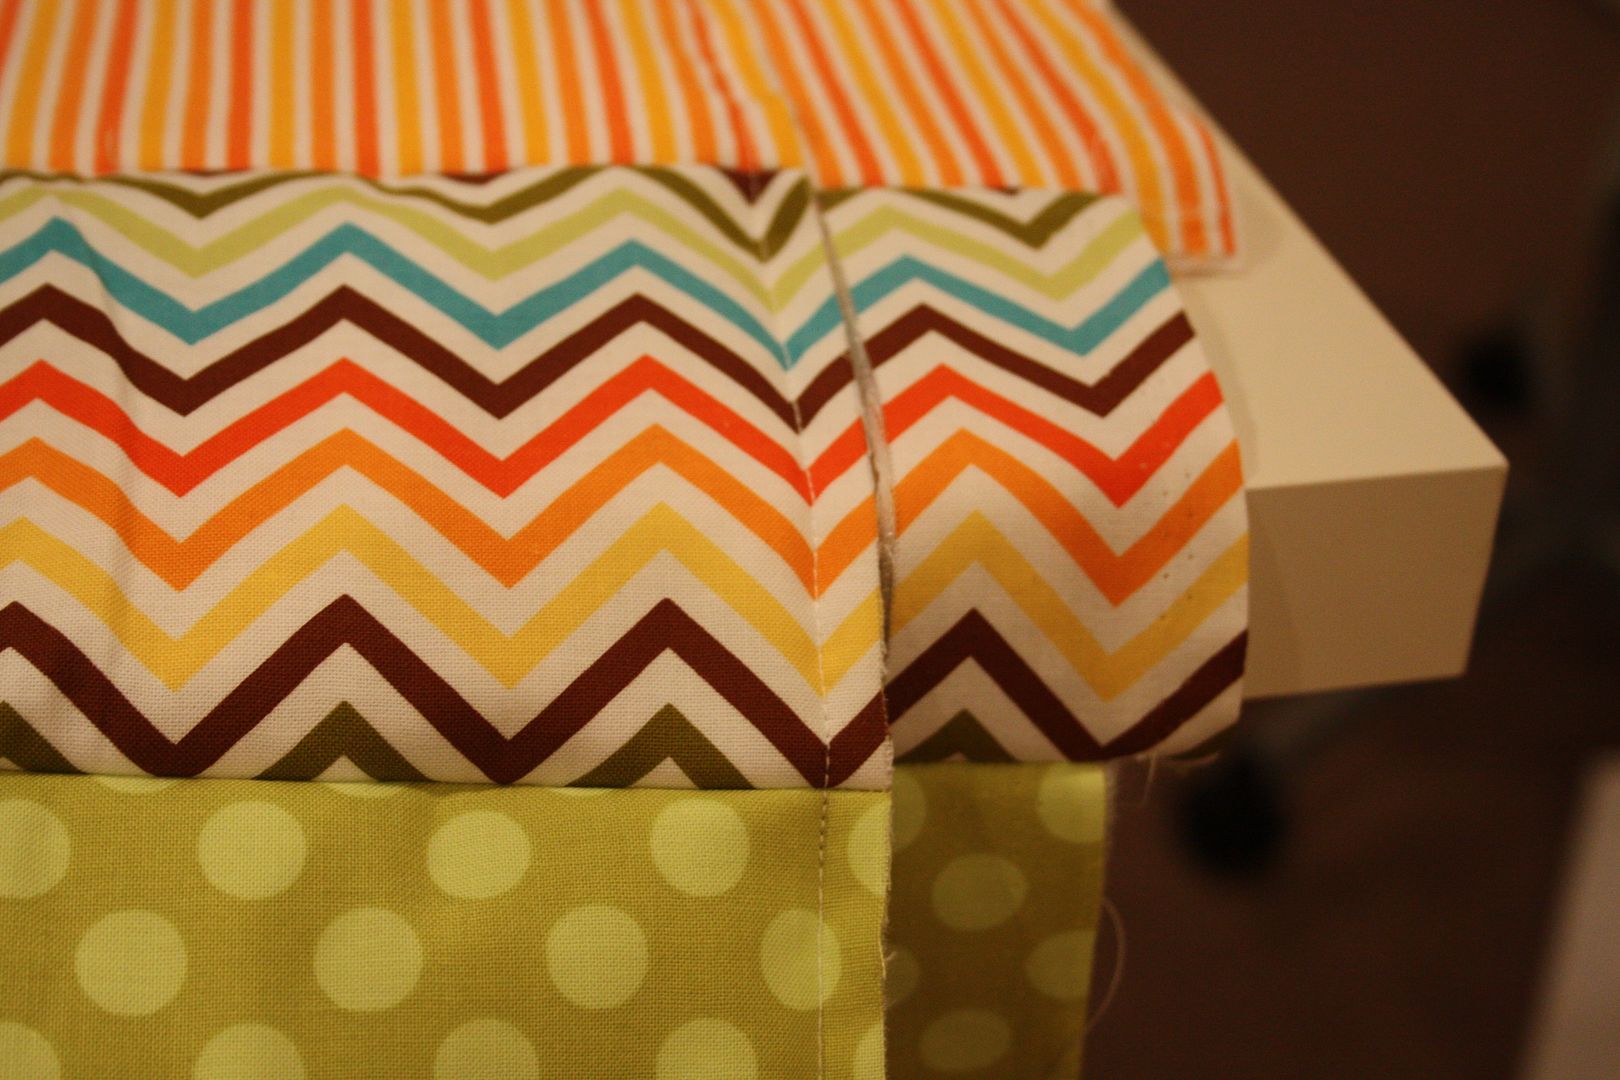
Pin together your first strip. You will put wrong sides to wrong sides with batting in the middle.

Step 5:
Repeat the same process with the next strip.
Step 6:
Pin two strips together and sew.


Step 7:
Repeat this process all the way down.
Step 8:
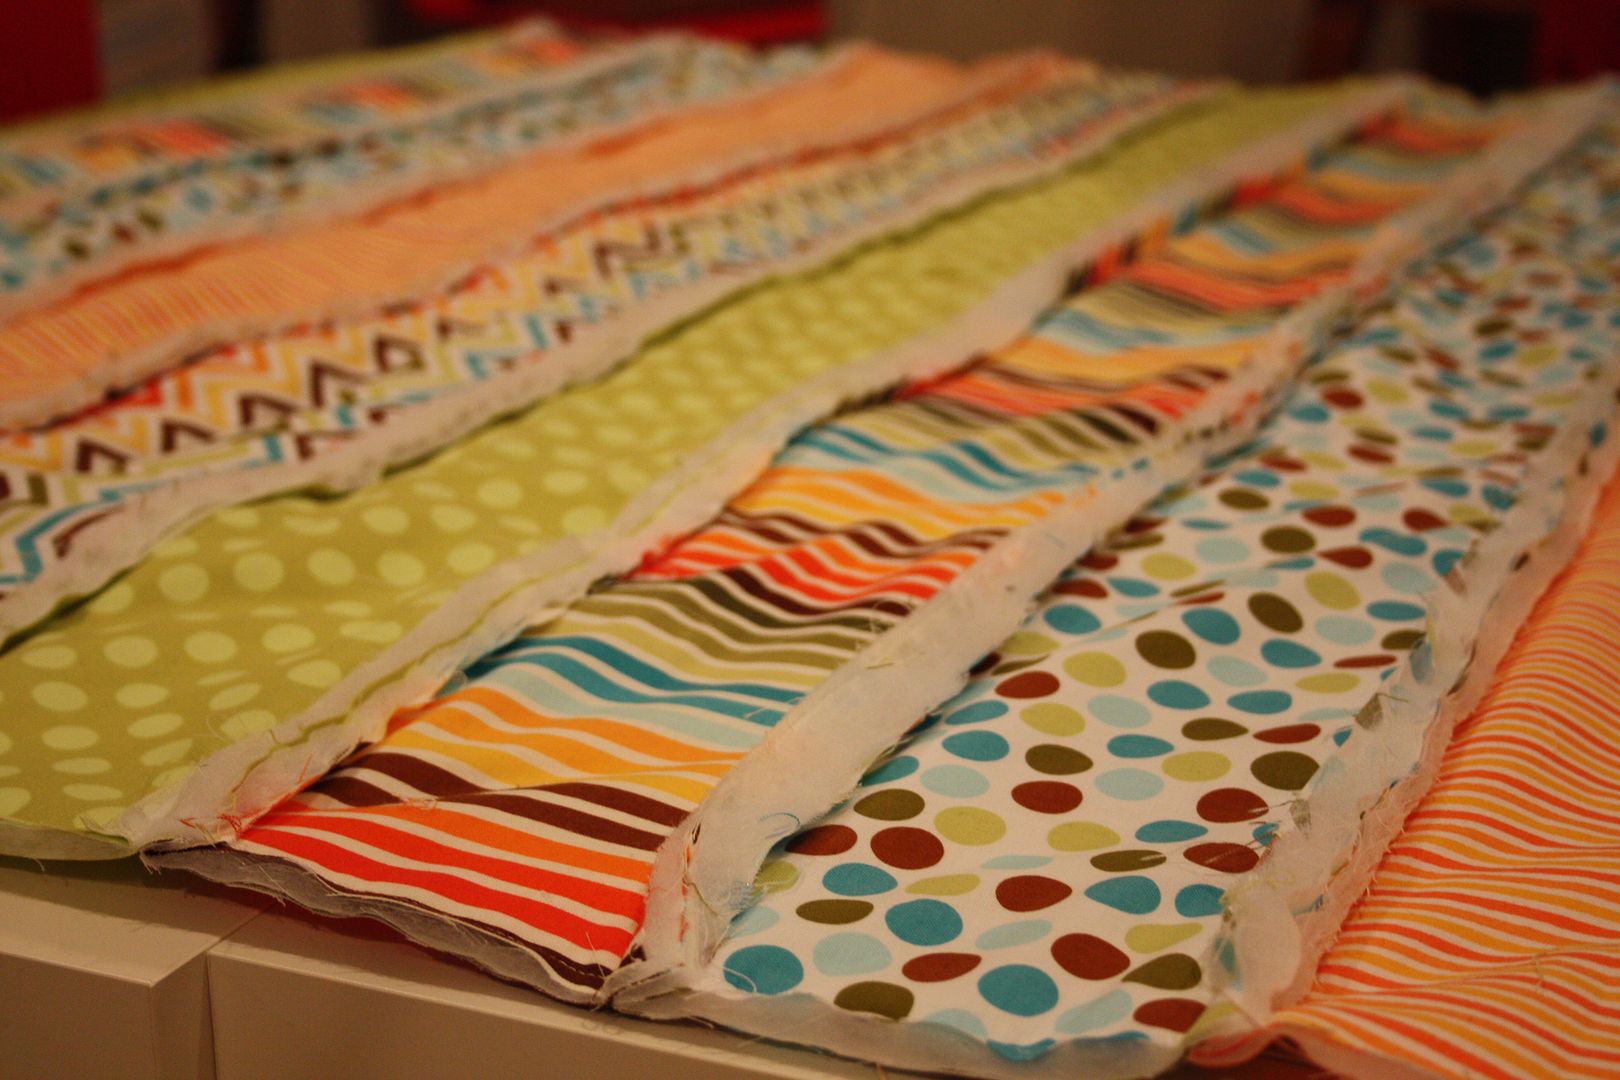
Sew together the sides and top and bottom and trim.
Step 9:
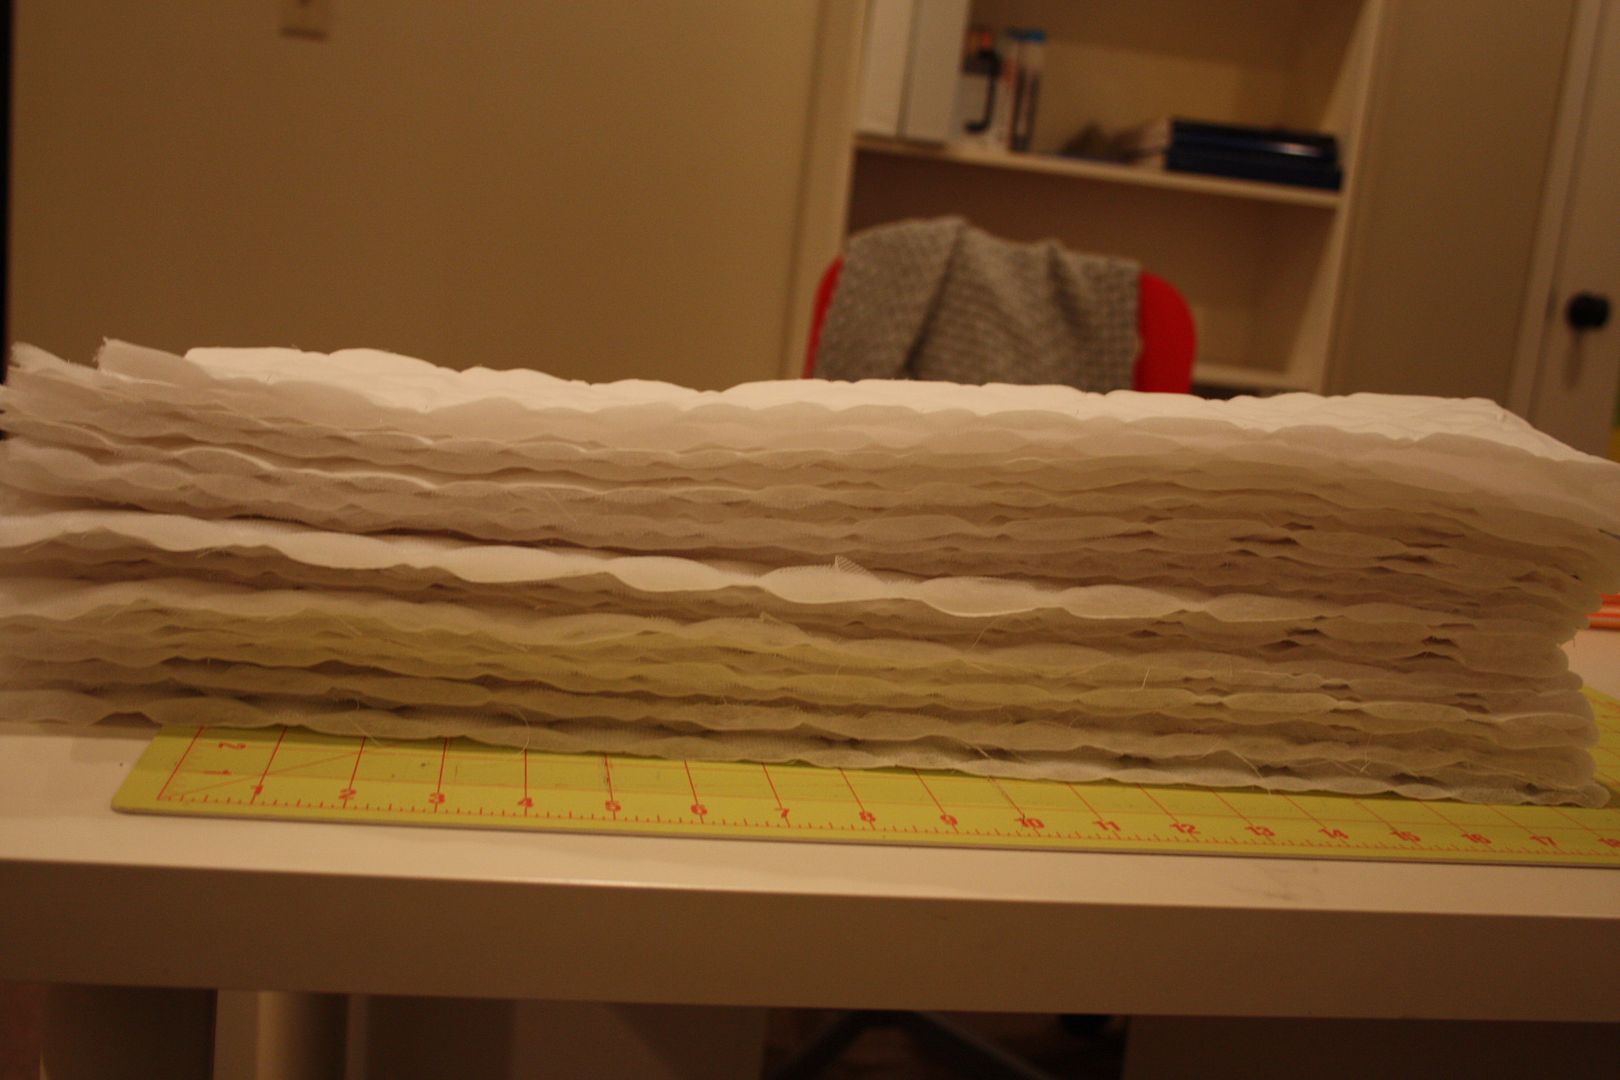
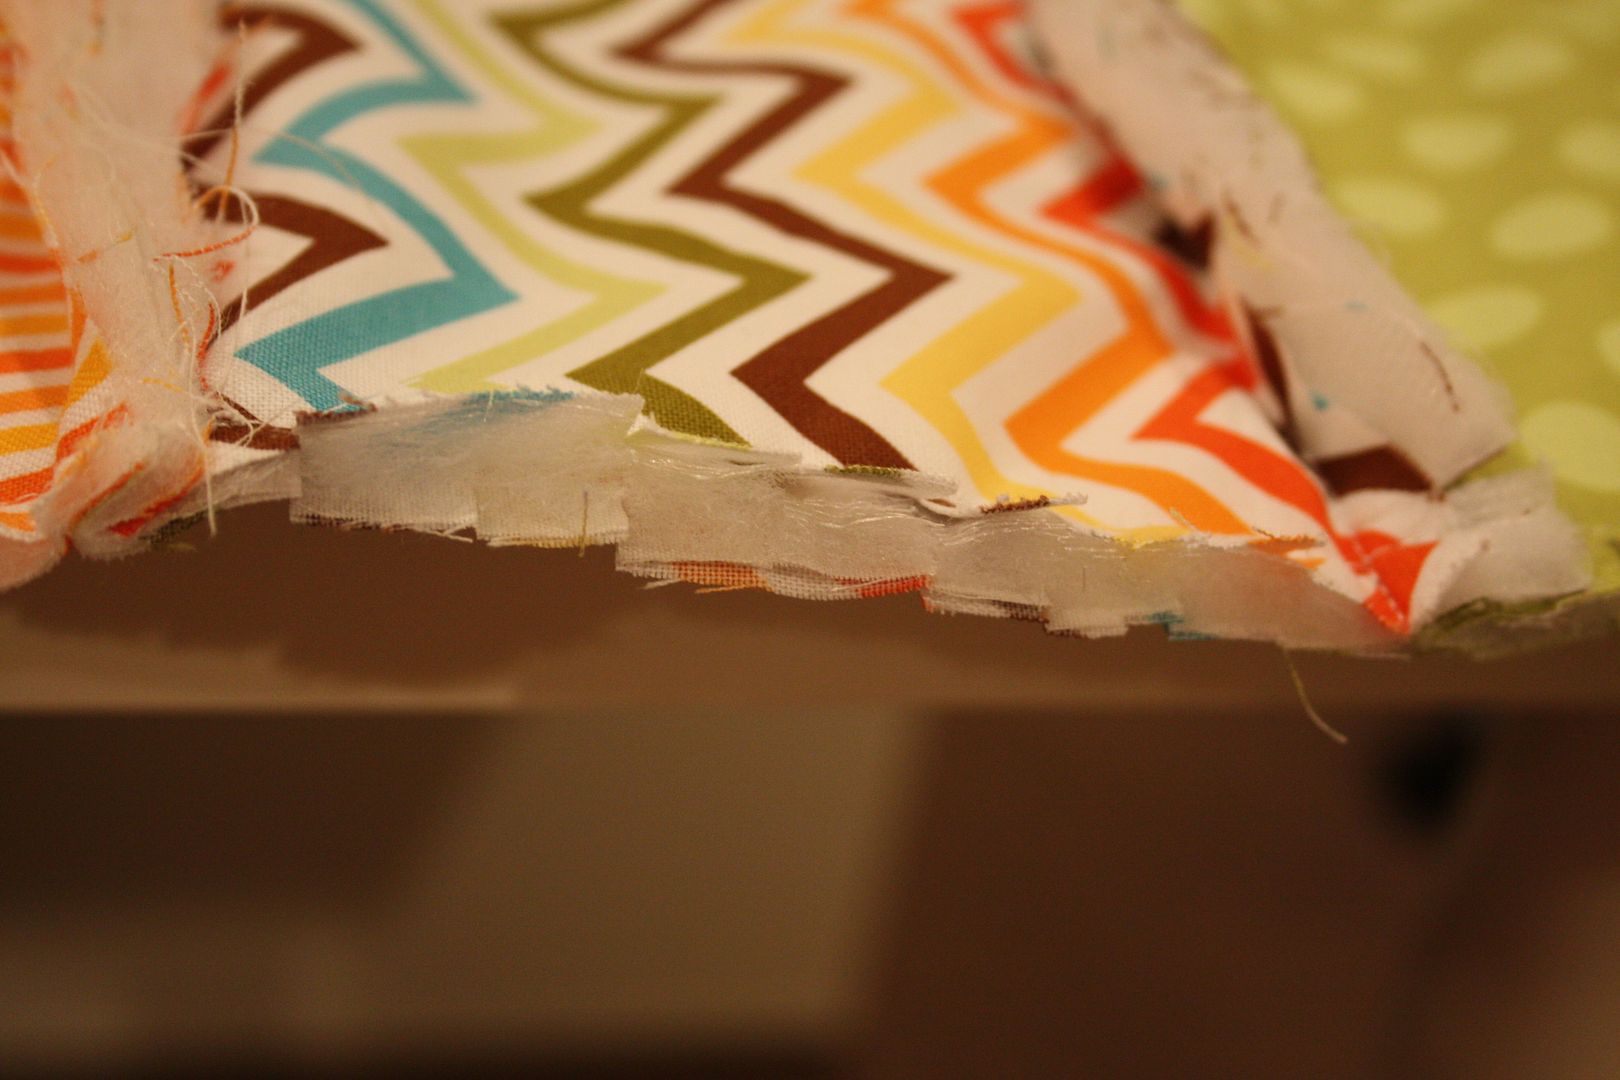
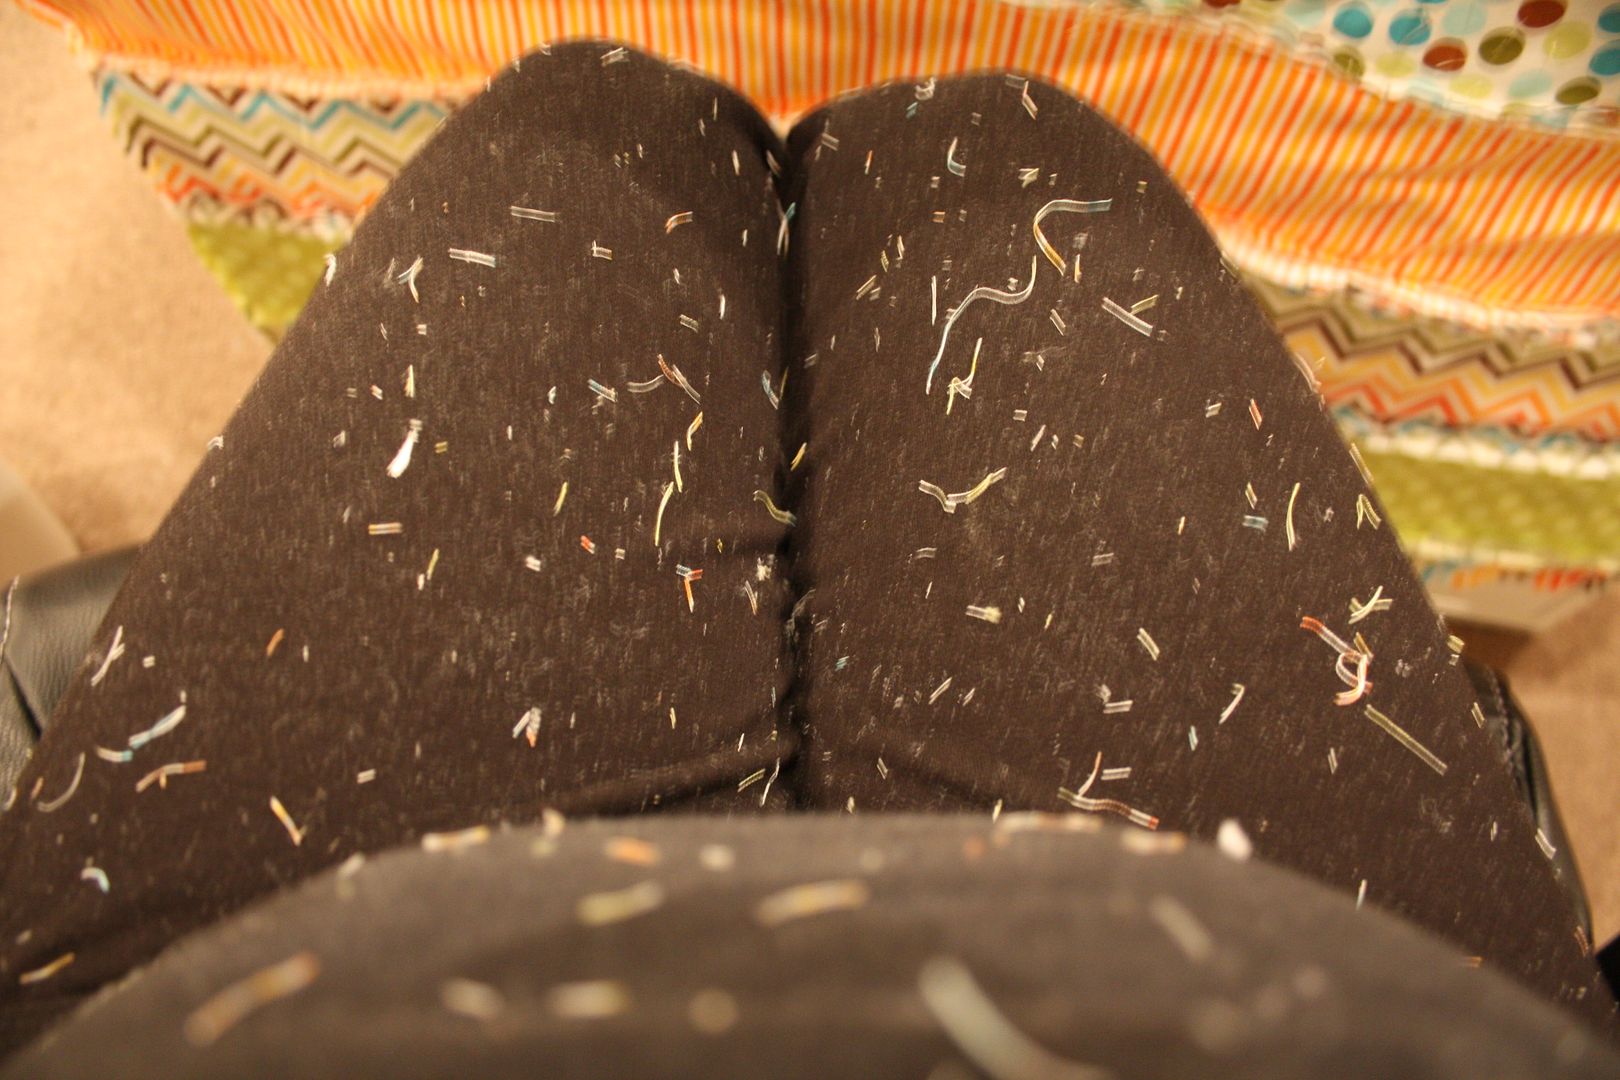
Now for the messy part...get ready for tons of cutting. As I said earlier, I used quilt batting for the center of my two pieces. At this point, I didn't like the way that it looked.

Step 10:
Once all the batting is cut out, start snipping away on all the edges. You will cut about a 1/2 apart down every strip and around the edges. You need really sharp scissors for this. Jamie always complains that my scissors are dull and won't cut a wet noodle. I now understand why my mom got so upset with me using her sewing scissors for paper now. Invest in some good fabric scissors and hide them from everyone else!!! Be careful not to cut into your stitching!
This will make a mess. You will have strings EVERYWHERE!!
Step 11:
The last step is to wash the quilt. This will create more of a frayed look on the edges you cut.
Here is a video tutorial that I watched on youtube. She did hers with squares instead, but that was too much more work for me☺
If you cut the batting slightly smaller than the strips would it eliminate cutting it later? I've never made one, but it seems it would work. Your quilt is so cute! Inspires me to make one!
ReplyDelete